The holiday season 2020 is promising to be one for the record books. We all want to keep the jolly in the season for our children. Many families have been rediscovering the pleasures of home cooking, bread baking and crafts like knitting and sewing. If you are reading this, you probably have a young child, or several young children, who are expecting a visit from a man in a designer red suit. Or, maybe you want to keep little hands and minds busy creating gifts for others as part of your holiday traditions. You can start your own family Secret Santa or, as a family, create something really special for a neighbor.
Many parents have noticed that their kids seem to enjoy playing with the large cardboard boxes that household purchases, like refrigerators, come in. Sometimes kids seem to enjoy the gift box more than that toy we spent hours searching for. My theory is that cardboard boxes are empty slates that allow a child’s imagination to run wild. All they need are crayons and an idea. You can enlist this imagination to give your child the gift that can be shared with others. I started with an online search for cardboard box designs and found a dollhouse, a spaceship, a car, and a playhouse that can be brought to a finish as simple or as elaborate your child might wish. I am focusing on two Dollhouse designs for this week’s blog, with The Spaceship, Car and Playhouse reserved for my next post. Just as with real houses, doll houses appeal to boys and girls alike. They can be cozy or fancy. So I am giving you two types of dollhouses to get you started.
As always with Gabbing Blog activities and games, these creations are made from readily available materials and can be enjoyed as your child builds speech and language skills. I hope you will find that these craft ideas can also help you to instill a spirit of generosity towards others in this special season. Oh, I almost forgot. These are fun, too!
Two Dollhouse Designs
Target Skills: Vocabulary: parts of a home(ceiling, walls, floor, window, door, corner, kitchen, bathroom, bedroom, living room, etc.}, size (large, medium, small), math (inches, fractions, top, bottom, numbers, shapes), building parts (wood, plaster, glass, vinyl), craft materials (tape, glue, scissors, etc.), concepts (sticky, safety, home, family). Following Directions, Creating a Plan, Cooperation, Task Completion.
Object of the Activity: To create a unique dollhouse that will provide hours of playtime fun.
Simple Dollhouse https://modpodgerocksblog.com/cardboard-dollhouse
This project is from the Modgepodge website. It is suitable for a “beginner” skill level. Younger children can make them for their own pleasure or to give as gifts. You can add levels to the house or create an apartment building by creating additional boxes and stacking them. They used a recycled box for their example, so it is a make it, play with it and toss it kind of project. The materials are simple. You probably already have them in your home.
Materials: Mod Podge Gloss or Matte, Small Cardboard Box (a shoe box is perfect), Paint, Scrapbook Paper, Magazines, Painters Tape, X-Acto Knife (adults should be in charge of using this piece of equipment), Children’s Scissors, Paint Brushes
Step One: Create Your Dollhouse Shape You can buy boxes for about50 cents each at a store like Target or Walmart, or you can use shoe boxes for this project. If you choose a folding box, cut the end flaps off of with your X-Acto knife for the back wall. Then I cut all four flaps off for the front opening of the dollhouse. With a shoe box you can skip this step.
Step Two: Tape up Box with painter’s tape, it’s flexible and easy to paint over. Young children will have fun with this step. Again, if you use a shoe box you can skip this step,
Step Three: Paint the Box You can use those sample size paints you get at Lowes or Home Depot for this step. Let the kids pick any color they want. The small sample jars cost about $3.00. You can also use any left-over household paint you might have on hand. Apply a total of three coats, letting each coat dry for 20 minutes. You can also use a blow dryer. It can help prevent warping, and it also prevents impatient little ones.
Step Four: Now the FUN part!! Decorate the Back Wall. If you have craft paper handy, now is a good time to use it, but if you do not- no problem. You can use a piece of left over patterned wrapping paper. Or, if your kiddoes want to get really creative, they can design their own custom wallpaper using markers, crayons or paint and writing paper. Once you have settled on a design, measure and cut your paper to fit the back wall. Start at the top of the “wall”, adding some Mod Podge and laying the paper on top. Then work your way down. Don’t overdo the Mod Podge, just paint on a thin layer.
Step 5: Add Details. A little girl or boy will have a blast going through catalogues, magazines and old picture books picking out furnishings for their house. Mirrors, pictures, flowers, etc. A fun twist would be to decorate the room for a favorite cartoon or storybook character. What kind of rug would Goofy like? What kind of mirror would Harry Potter choose? Here is where your child can perfect their scissor skills, as you talk together about size, placement and why he selected that particular item. Once the picture is sufficiently clipped out, paint a little Mod Podge on the back and gently placed it on the wall or floor. You can also add a thin coat of Mod Podge on top to seal the picture flat.
Step Six: Furnish the room. You can purchase inexpensive dollhouse furniture from a dollar store, you can create origami furniture together, or you can create furniture from small match boxes. Let your child’s imagination run a bit wild!
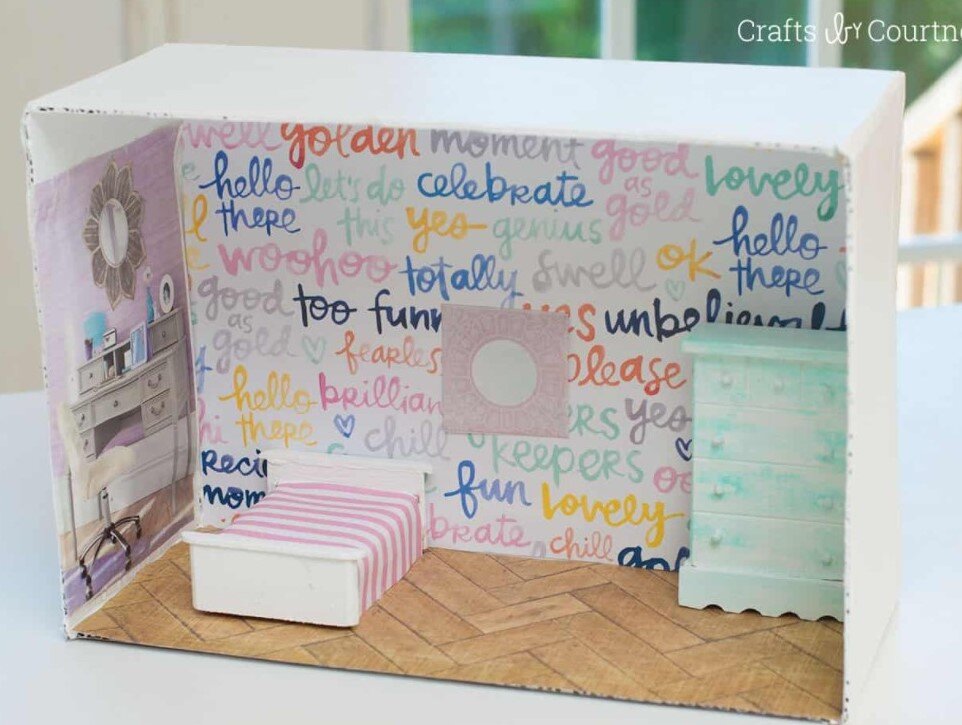
Fancy Dollhouse https://www.craftsbycourtney.com/how-to-crafts/cardboard-box-craft-diy-dollhouse/

I found this design on a terrific website. It is only one of the creative designs you will find on Courtney’s webpage. This design is illustrated with photographs for each step, so if you want to build this house, please go to her site for the details. An experienced crafter, she designed her dollhouse with children in mind as the end users. You may find that this project is more suitable as a family activity, or as an endeavor for the more independent older children to create for their younger siblings. I am listing her materials recommendations as per her directions, but of course you can customize them to meet your own design preferences and availability. As you can see from the picture, Courtney’s creation is spectacular.
Materials: 1 16” x 16” x 15” Cardboard Box, 1 Roll of Green Painters Tape, 2 Glue Sticks, Craft glue, Hot Glue & Gun, X-Acto Knife, Cutting Mat, Yardstick, Standard Size Circle Punch, 4 Push Pins, 2 Small Beads, Black Permanent Marker, 4 Sheets of 12” x 12” Scrapbook Paper w/Various Patterns (2 w/same pattern) for Interior Walls, Can of White Spray Paint, 20 23 Sheets of 8 1/2” x 11 Cardstock for Siding and Inside Molding (Your Choice of Color), 4 Sheets of 12” x 12” Cardstock for Roof Shingles (Your Choice of Color), 1 Sheet of 12” x 12” Cardstock for Door and Inside Molding (Your Choice of Color), 1 Sheet of 12”x12” Cardstock for Outside Molding, 4 Sheets of 8 1/2”x11” Wood Scrapbook Paper for Flooring, 2 Small Plastic Beads
Step One: Create Your Dollhouse Shape: To create the top of your house, cut off opposing flaps from the top of your box. Next, draw out triangles on the remaining flaps. Then, cut the flaps with an X-Acto knife. Flip the box over and cut opposing flaps from the bottom of the box and tape them together. This will create the bottom floor. Finally, cut an opening in the back of your dollhouse by cutting (leaving a 1” edge on the left, bottom and right of the box).
Step Two: Paint and add Wallpaper. Paint the interior walls by spraying 3 coats of white spray paint (add more if needed) into the box on the left, back and right. Be sure to spray all the way to the top and the sides. Let each coat dry 10 minutes and let the final coat dry at least an hour before handling. Add interior wallpaper and baseboards. To make your wallpaper, cut 2 sheets of patterned scrapbook paper to 8” x 8”. Then, cut the other 2 sheets to 8” x 12”.
Step Three: Add Windows and Doors First draw out the front door to 3” x 4 1⁄2” and cut the top, left and bottom using an X-Acto knife. Then the draw and cut out your windows.
Step Four: Flooring. You can use wood look scrapbook paper or another paper of similar thickness, add by using a little glue to keep in place.
Step Five: Exterior Siding and Window Frames. To create your siding, cut 15 sheets of your cardstock into 1” thick strips. Then glue them around the dollhouse using a glue stick. Start from the bottom and go around the house in a single row. Repeat going up until the dollhouse is covered in cardstock siding.
Step Six: Upper Floors and Wall Partition. First, piece together the 2nd floor and wall partition. Then, hot glue the floor to each floor support. Add a dab of hot glue to the top of the wall partition touching the dollhouse. Next, hot glue the top floor to each of the remaining floor support. Add a dab of hot glue to the top of the wall partition on the other side touching the top floor.
Step Seven: Create and Attach Roof. Cut a scrap piece of cardboard to fit to the part of the dollhouse. Punch out LOTS of circles for the roof shingles. Next, glue them to the top of your roof using craft glue (starting from the bottom left and going right, then repeat going up). Each row is about 16 shingles and there are about 15 rows. Now firmly place you roof on the dollhouse using hot glue to keep it in place.
Step Eight: You are ready to Finish and Furnish!
But wait! There’s More! Come back for the next Gabbibng Blog where you will find more cardboard box creations to make your holiday spirits bright!