Smoothing the Transition from School to Home: Dealing With After School Meltdowns

Another school year is now underway. Summer routines must adjust to the requirements of school schedules with hours spent away from home surrounded by teachers, other kids and school rules. For many children, particularly those with identified ADHD or ASD challenges, the transitional points of the day, particularly the return home, pose a reoccurring and dramatic punctuation to the day. If you find this to be the case for a child you love, this is a post for you.

www.yourkidstable.com

www.yourkidstable.com

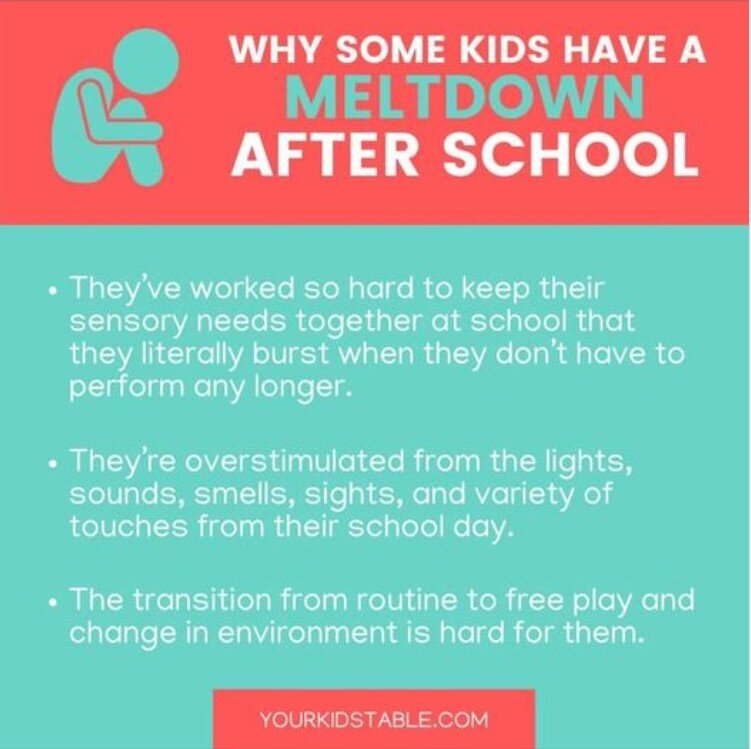
After School Meltdowns don’t look the same for every child. Some will “explode” as soon as they arrive home, complete with yelling, violent outbursts, physical aggression and refusal to calm down. Others will implode. I had one student, a 6th grader just starting his first year of middle school, who secluded himself in his clothes closet and refused to talk to anyone or come out until dinner time. Others will exhibit more subtle behaviors that are no less concerning for the family, with mood swings, lack of affect, refusal to eat, play with siblings or friends, “exploding” when it is time to do homework or get ready for bed.

Since this is perceived by the family as a change in the child’s usual behavior, most parents will begin to hypothesize that something is “going on” at school to cause this change. They are often surprised that the teachers report excellent behavior in the school setting, with established positive peer relationships, schoolwork completion and academic progress. This can cause a breakdown in trust between the school team and the family, particularly when this pattern shows up in the later elementary and middle school years with students who had been making anticipated yearly progress working with previous IEP or 504 Planning teams. It is not illogical to look to the change in setting, educational team or peer group as a root cause. Once this is ruled out through data collection and an honest and open discussion it is time to look to the next likely possibility.

Experienced educators have a name for this phenomenon: After-School Restraint Collapse. Think of it this way. How long can you hold your breath? A minute or two? How long can you hold your stomach muscles in before gravity takes over? 15 minutes? An hour? This is what it feels like for kids with ADD/ASD/ Social Anxiety as they cope with the consistent stress of controlling your emotions throughout the school day. Especially in the high pressure world of school, where it isn’t only the adults you need to please, but your peer group who never forget what happened last year in PE, not to mention this morning. in Math class. Once the child returns to the safe environment of home the dam will break and the motional river will overflow. While for some this pattern will lessen and disappear as time goes by and a new routine is established, for others it does not.

So, now that you and the school team have ruled out external factors such as bullying, what comes next?

The first step is to identify those factors that your child faces during a typical school day . While these expectations may vary by school setting or grade level, just a glance at this list will remind you of the stressors present in a typical school program:

  • Have a structured time for eating and playing

  • Go to the toilet only during break times

  • Play by the rules: must stay in designated areas, only run on grass, can’t touch other children, or climb on everything they may want to.

  • Put their hand up to speak, and will not always be called upon by the teacher even if they know the correct answer

  • Sit still for long periods of time at a desk or on the floor

  • Wear closed-in shoes all day long

  • Behave a certain way as outlined by the teacher, even if they are not sure exactly why they have to behave that certain way

  • Remember and follow all classroom and school rules

  • Manage disappointments and setbacks without Mum or Dad present

  • Understand and learn to interact with older children

  • Cooperate with their peers, even though there may be some children they don’t like

  • Sometimes they must work with children who can behave irrationally or in an unexpected manner e.g. by saying something unkind, touching their belongings, interrupting their concentration, or even physically hurting them

  • Be expected to calm down after an exciting or upsetting event to focus on school work

  • Concentrate on multiple tasks throughout the day from a range of different learning areas

  • Follow directions from several different adults (who in the eyes of the child can unexpectedly talk sternly towards them at any time)

  • Be expected to work under a variety of classroom and environmental conditions

Your child may be able to help you identify the parts of his day that are causing him the greatest difficulty. Once identified, it may be possible for the school team to assist him by adjusting the schedule. For example by allowing more bathroom breaks or by providing him with alternative seating such as a wiggle chair. Younger children may not be able to verbalize where the difficulty lay. They often say things like, “The teacher doesn’t like me” or “The kids hate me”. Remember this is the emotion speaking, Here is where classroom data can help determine what accommodations, if any, are candidates for a trial run and the effectiveness of any particular accommodation over time.

Older students in particular, may balk at any suggestion of accommodation, wanting to fit in, and not stand out in anyway from their peers. They may have already learned to control their reactions during the school day, successfully concealing their difficulty from teacher and peers. So, then what can a parent do at home?

Photo by Jeswin Thomas on Unsplash

Kaylene at Autistic Mama has a three step approach to home management of after school melt-downs.

#1 A Preferred Calming Activity.

This activity will vary from child to child and family to family. Some suggestions include listening to music, watching a favorite video, listening to a podcast, or perhaps a calming fidget toy. (Personal note: When she was in middle-school my daughter loved to lie down with a cool washcloth on her forehead for a few minutes as she listened to an audio book . We called it “spa time”. She didn’t need it everyday, but it was always available to her when she did need it.) Whatever works for your child to give him time to calm himself, rest and recover to make the transition from school to home.

#2 Meet Basic Needs

Make it a habit to get comfy when you arrive home. An after school snack, a nice cold or warm drink, alone time in the bathroom to wash-up, and change clothes. These are all transition activities we humans enjoy. There is no great rush to get homework done. It can wait for an hour or so. (A shared snack or glass of milk is also a great conversation opener to talk about the ups and downs of the day. )

#3 A Sensory Strategy

Kaylene recommends that you take a few minutes for a sensory activity before jumping into homework or other evening tasks. This can be very effective for all children, even those not identified as ADHD or ASD. A brief snuggle in a warm, weighted blanket as you review the homework assignments together may ease the start of homework time. The idea here is to set up a transition to the next step in the evening: getting homework done. Some kids enjoy a rhythmic “hobby” like weaving or a rhythmic exercise such as yoga to allow them to focus on the next task. Its worth the effort if it avoids a melt down.

I would add one more consideration. Examine your child’s weekly schedule to be sure that he is not over-loaded with activities. Everyone need some “down time”. Make sure that on those days that he is scheduled for ball practice or scouting he also has time for at least #s 1 and 2 on Kaylene’s list to ease the multiple transitions from school to home to after-school activity.

For more ideas about how to handle home-schooling, homework, and after-school activities take a look at these blog posts:

Music-and-Sports-and-Art-Lessons-Oh-My! how-to-avoid-over-scheduling-your-child

Back-to-School-or-Back-to-the-Kitchen-Table-planning-for-your-childs-education-in-a-time-of-pandemic

Dealing with Bullies: The Signs That Your Child is Suffering and How to Help.

Any adult who was bullied as a child will tell you the experience has followed them through their life. For those who figured out how to handle the bully and overcome the experience , it made them stronger. For those who did not, however, it can lead to a life filled with feelings of inadequacy and unsatisfying adult relationships in the workplace and the home. So, the sooner we identify the problem of bullying and help our children to deal with it successfully, the better their entire lives will be. I will end this post with recommendations on how to help a young child, up to age 10 or 11, handle a bully. If you have an older child, Middle School through High School, I will refer you to a few websites I have found that may be helpful for this age group, moving into adulthood. This may be a long blog post about a very serious problem. So, lets get started.

bullied child.jpg


What is Bullying?

Kids Health (https://kidshealth.org )describes bullying  behavior as follows: “Bullies might hit, kick, or push to hurt people, or use words to call names, tease, or scare them. A bully might say mean things about someone, grab a kid's stuff, make fun of someone, or leave a kid out of the group on purpose. Some bullies threaten people or try to make them do things they don't want to do.”

Parents Magazine (https://www.parents.com/) defines it this way:” Bullying can exist in many forms: It can be physical (pushing, punching, or hitting); verbal (name-calling or threats); or psychological and emotional (spreading rumors or excluding someone from a conversation or activity). And with the pervasive use of social media, inappropriate behavior between kids can occur outside of school hours via emails, text messages, and Facebook posts. These exchanges, known as cyberbullying, can be particularly hurtful and aggressive, and their harmful effects are often brought back into school the next day.” 

As a parent or educator, you may not be aware of these bullying behaviors. You may, however, be very aware of their effects on the targeted child.

Warning Signs

Parents report concerns that their child’s behavior has suddenly changed. A child who previously loved going to school or scout meetings, suddenly doesn’t want to go anymore. When asked why he just shrugs or responds with every parent’s favorite…”I don’t know. I just don’t like it.” Some parents notice that the child who always got along well with her siblings, suddenly changes course and begins to lose patience with them for the slightest thing. Some notice that their child has become withdrawn and uncommunicative or extremely self-critical. Grades may suffer. It is very hard to concentrate on schoolwork when you are preoccupied with anticipation of the next attack. All these behaviors may indicate that your child has become the victim of a bully.

Why My Kid?

If you are like me, you will look at your child and see a cute kid who is dressed well for school, clean, verbal, bright and fun to be with. Why would anyone pick on her?

I will not dwell on the motivations of the bully. That is another discussion for another day. But this brief description from Kids Health (https://kidshealth.org ) provides a some insight into the question of why.

“Sometimes bullies know that what they're doing or saying hurts other people. But other bullies may not really know how hurtful their actions can be. Most bullies don't understand or care about the feelings of others. Bullies often pick on someone they think they can have power over. They might pick on kids who get upset easily or who have trouble sticking up for themselves. Getting a big reaction out of someone can make bullies feel like they have the power they want. (emphasis mine) Sometimes bullies pick on someone who is smarter than they are or different from them in some way. Sometimes bullies just pick on a kid for no reason at all.”

The Many Forms of Bulling

Bullying is more than somebody saying or doing something mean. It is a campaign of cruelty that targets a person identified by the bully as vulnerable. Johnny Shannon is a motivational speaker from Australia. (https://www.jonnyshannon.com). He has made a career of speaking to groups of students about his own experience with being the target of bullies. He has made a study of the topic.  Mr. Shannon describes 6 main types of bullying. These categories are developed for his speaking engagements to High School aged students. In the second half of this blog post I will address my recommendations to those types of bullying behaviors most relevant to a grade-school population. Keep in mind that none of these types of bullying are age specific. They can happen at any grade level and into adulthood. Here is what to look for:

1.     Physical: This is the most obvious sign to watch for. The bully uses his/her larger size and strength to physically weaken or to harm the target through force or to intimidate with the threat of force. If a child is harmed physically this may constitute a crime of assault, no matter the age of the bully. No child should ever be purposefully physically harmed by another.

2.    Verbal: We all know that old saying “Sticks and Stones may Break My Bones, But Words Will Never Harm Me.” Well, its false. Words wound deeply. Verbal bullying is the favored technique of the physically small child, the older child, and adults in the workplace. They use language in the form of insults and painful comments to belittle the target to shame them. Especially when, as in the case of a child with a disability or an adult with a bullying supervisor, the target cannot fight back. Most insidious, the verbal bully seeks opportunities when teachers or others aren’t present. If the child reports the bully, he is often told to “ just ignore him” or to shoulder some blame for the situation. “Well, what did you do to make him say that?” Not helpful. Verbal and Physical bullying often go together, especially when dealing with groups of bullies who often escalate to one up each other.

3.    Cyber Bullying: I follow many parenting groups online. I recently have seen an up-tic in concerns about cyber bullying as many of our children are receiving their education remotely during the pandemic. Along with the rest of us, bullies are becoming more tech-savvy. Anyone who uses Facebook can see how quickly an innocent statement can be followed by a thread that deteriorates into an insult-fest. The same principle applies to chat rooms, private messages on Zoom, text messages etc. Hiding behind a screen, bullies can become vicious very quickly.  When someone uses the internet to share hurtful comments, slander, embarrass, threaten, harass or otherwise harm someone else it is cyber bullying.

4.    Emotional Bullying: This form of relational bullying can easily be missed by parents and teachers as it is not easy to identify. This is most prevalent, but not restricted to, female social groups, mean girls and frenemies. The targeted person is ostracized by one or more of their peers, thereby changing their social standing in the group and enhancing the standing of the bully. This is an insidious form of social manipulation. This is done by spreading lies about the target., sharing secrets told in confidence, publicly embarrassing the target, manipulating social situations, and breaking trust with the targeted person.  The target is left feeling alone and unlikeable, abandoned by those who she thought were her friends. Retaliation can lead to a cycle of ongoing bullying. 

(Just as an aside. I remember wondering as a teenager why these mean-girls were called popular. Nobody seemed to like them very much.)

5.    Prejudicial Bullying: The evil of prejudice based on race, creed, sexual orientation is at the base of this bullying behavior. Rarely a standalone occurrence. Often physical, it can also include verbal and cyber bullying. It is critical to take every instance very seriously. This can constitute a hate crime.

6.    Sexual Bullying: Sexual bullying can range from physical to verbal and emotional attacks like name calling, crude remarks, obscene gestures, exposure, or  unwanted touching. These include any verbal or emotional attacks that seek to humiliate or shame the target sexually. It is not uncommon for girls to label other girls with shameful, hurtful terms that insinuate promiscuity. Although these most often target girls, this can also be true for boys. This can happen between people of the same gender as well as opposite sexes. When it turns physical it changes from bullying to sexual assault. Cyber bullying and sexual bullying can occur together.

How to Find Out what is Going On

If you observe the changes in behavior I described above under warning signs, you may have suspicions that your child is being bullied. How can you know for sure, especially if your child refuses to open up to you? As always, communication is key. If you have followed this blog, you will find that along with games to build language and academic skills I have focused on creating a healthy, ongoing parent/child relationship through building regular, open and accepting communication. Here is one occasion when that ground work will pay off. But, if your child has become withdrawn and won’t open up, start with your own observations.

·      “I have been noticing lately that you don’t want to go to school. You always loved school. What changed? Maybe I can help.

·      “You have always been so good with your brother, even when he is a little pest. I noticed that you are angry with him a lot lately. What is happening and how can I help?

·      You have always been such a good student, but lately I see you are having some school troubles. Let’s talk about it a little. I have some ideas on how I can help get you back on track, but I want your ideas, too.

You know your child. Your goal in this conversation is to 1. Let him know you can tell something is wrong because you love him and notice his struggle. 2. Tell him that you are on his side no matter what is going on, and 3. You are an adult and can use your “grown-up” powers to make things better, if he will allow you to help. If your child will not open up to you, perhaps another trusted adult can step in. Grandparents, older siblings or Aunts and Uncles are usually great for this.

Do not overreact. You may want to go wallop that bully or call his parents to complain about their kid. I can tell you from experience, this will only make the situation worse. Your child needs for you to listen, with sympathy and compassion. He needs to know that you can be depended on to help him find his way out of this. Keep your reaction as neutral as possible. Support his emotions. Ask questions, Get details. All this information will be useful in formulating your plan to help.

Now that you know, what can you do to help?

Bullying must be approached from two perspectives. The first is external. In the moment of bullying, how is your child going to react to neutralize the threat? The second, equally important, is internal. What is your child sensitive about? How can you help him address those issues the bully targets?

External

When this happened to my daughter, she was 7 years old. I will not bore you with details, but I was fortunate to work with a terrific school psychologist who understood bullying and its effects. In my daughter’s case the bullying was social and verbal, not physical. We worked with her to develop at least 5 reactions that she could use in the moment, when confronted by a bully in the classroom or on the playground. My daughter was a smart little kid, so we framed it as a scientific experiment. She actually kept track of which technique she used, if it was effective and how many times she needed to use it for it to be effective against the bully. Even now, as an adult, she tells me she has used some of these techniques in the workplace. They are still effective. The important thing for your child to remember is to stay in control of his emotions. The bully likes to upset them and wants a big reaction. As Johnny Shannon (https://www.jonnyshannon.com) observes, the bully gets a big reaction (the payoff) for very little effort (the stimulus). Deprive him of his payoff.

Note: In my opinion, if the bullying is physical. I would treat it as an unlawful assault. I understand the reticence to get all legal on the bully, especially a child, but physical harm is unacceptable at any time or age. Report it to the school principal if it is on school property. If you do not get satisfaction from that source, consult an attorney about going further. If it is off school property, report it to the police. Do not mess around. If possible, remove your child from that environment. His safety is your first concern.

5 Ways to React and Keep Your Cool. Get Control of the situation.

1.    As PeeWee Herman used to say, “I know you are, but what am I?”. If possible, turn the insult back on the bully. This is a subtle one and must be used judiciously. If the bully calls you ugly, respond with, “I’d rather be ugly than stupid. “ Or if he makes fun of your clothes, then respond, “At least I can change my clothes.” The trick is to keep the “like you” part of the quip silent. The comeback should not be an insult to the bully, which will only enrage him more. That is the beauty of the implied insult.

2.    Do not respond to the insult. Just keep[ saying, “What? What did you say?” I don’t understand you”. Get the bully to repeat the stupid thing he or she said over and over until they tire of the game. (This was one of my daughter’s favorites.)

3.    Walk away as though you didn’t hear them. It is important to carry on with an activity or engage in a new one that you enjoy immediately. This is particularly good on a playground where the target can climb or do something he is good at that the bully is not so good at.

4. The cold stare. This is the facial expression that communicates, without words, that the bully is an idiot. We all know that look. This look puts the bully in the position of responding to your coolness, not your upset. Encourage your child to stand tall and proud. Looking down and hunched over is almost as rewarding to the bully as crying. Keep eye contact and use the “look”.

stare.jpg

It is my favorite way to react to a bully. As an adult I use this look all the time.

5.    Immediately turn your back on the bully, but don’t move and don’t react. This was surprisingly effective, but not to be used when physical aggression is likely.

We practiced scenarios when she would use each of these techniques before implementing them in real life. I would “spring it on her” using the bully’s words when she wasn’t expecting it, so that she would know what to do when approached by the bully. Practice makes perfect, and turns the exercise into a game.

When she was ready to use each technique, we debriefed on the way home from school. We would analyze the bully’s attempted insult, how effective her chosen reaction was, and if the incidence of the bullying was decreasing or increasing overtime. It did not take long for the bullies to move on.

Internal

Why is your child a target, and another child not? As noted above, it is the payoff of the big response. Bullies look for those things the targeted child is most sensitive about. They hit all the “buttons” until they find the right one. Fortunately, most of these sensitive issues can be changed or altered. Somethings can be addressed immediately with a little help from you. Other things may take time, but you can help your child develop a plan to get it done. While the remaining things can’t be changed, his attitude towards them can be. Here’s one way to get started as per Mr. Shannon, who had some great examples from his own experience. I am paraphrasing his chart, with a few ideas of my own. He has a great series of videos on YouTube that you may want to check out. This idea came from one of them.

Take a piece of paper and divide it into 3 columns. Label the columns at the top and number the column on the left 1 through 10

 as follows:

What I am sensitive about                    Can I do something About it?                  If not, can I change my attitude?

1.      My thick glasses                              Yes, someday I can get contacts

2.      My facial mole                                  Yes, as an adult, I can get it removed

3.      I am short                                             No                       Short people live longer

4.      I am not doing well in school         Yes, I can learn to study better    I am really good at art.

5.      .. am overweight                                  Yes, I can exercise and learn to cook.

You get the idea. Again, the goal is to give your child control over his feelings, actions, and reactions. You can add a fourth column on the page titled How Can I Help You? This will be a place that you can offer your assistance.

Addressing bullying from the inside is probably the most challenging part because it requires a change in self-perception from victim to self-creator. Keep in mind that it takes about 12 weeks of consistent effort to change most habits. Encourage your child to keep track of his progress over time. Prepare him to be patient with himself and stay with him on his journey until he no longer needs the help.

confident child.jpg

I hope all this information is helpful. Please let me know what works best for your family. I am always open to learning from your experiences.

Custom Crafty Cross Generational Cardboard Creations...Continued

A parent recently wrote that she was concerned that her older daughter, aged 10, was losing her patience with her younger daughter, aged 3, after having had a loving relationship until recently. With the winter holidays and the continuing difficulty with in-person schooling in the coming weeks this mother was asking for help in keeping the peace in her home and re-establishing the positive bond between her girls. Crafts and artful creations can build on the strengths of older more experienced siblings, encourage cooperation between family members, add fun to everyone’s day and develop social and language skills for younger siblings. (On November 12, 2020 I posted a blog with directions for Simple and Fancy Dollhouse creations. Check those out here: https://www.davidsgroup.org/new-blog/create-a-cute-custom-crafty-christmas-with-cartons)

As always with Gabbing Blog activities and games, these creations are made from readily available materials and are recommended for building speech and language skills in young children. In this blog we will also focus on developing the older sibling’s abilities by recognizing their maturity and ability to assume a mentor role for the younger child. Siblings share a life-long relationship that must be nurtured to grow strong. The older child will learn a bit about the developmental skills the younger child is learning to master, how and when to assist and when to step back as well as the targeted language skills to teach as they build together. I hope parents join in the fun, too. You may find that these craft ideas can also help to instill a spirit of generosity towards others in this special season.

As promised in my last blog post, I am including 3 Cardboard Creations that should be of great interest to older and younger sibling alike, no matter the age or gender: A Rocket ship, A Racecar, and a Playhouse. Feel free to customize your creations.

From Create the Chaos 2015

From Create the Chaos 2015


Rocket ship

Target Skills: Vocabulary: parts of a Rocket ship (blasters, port window, command module, computer center, view screen) craft materials (tape, glue, scissors, paints , crayons, paper, etc.), concepts (exploration, earth, sky, outer space, stars, moons, astronauts, pilot, navigator), Following Directions, Creating a Plan, Math and Measuring, Cooperation, Task Completion.

Materials: Large cardboard box (in our example: 36 x 22 x 16", larger are available), smaller cardboard for tip and wings, Packing tape or duct tape (use a higher quality packing tape or duct tape to prevent the Rocket ship from falling apart quickly), Scissors, Box cutter, Tape measure, Permanent markers. {I would also look around your home for fabric, poster paints, stickers, glitter, glue…anything that your family can use to customize and decorate the Rocket ship.)

Note: As you can see from the materials list, this is a project that may require adult supervision in the use of cutting tools. There are, however, many steps in the creation of your Rocket ship that are appropriate for children aged 3 and up. When you make your creation plan, discuss who will be doing which steps, together or independently.

Object of the Activity: To create a unique Rocket ship that will provide playful pleasure and encourage interest in exploration and science.

I found this project on Create the Chaos, a terrific website (https://www.createinthechaos.com/cardboard-rocket-tutorial/) with terrific ideas and printable directions for many kid friendly projects. I am including Ellen Russell’s directions for making a cardboard rocket along with her picture of the finished project. I encourage you to go to her site and see the step-by-step photographs firsthand.

Step One: Gather your materials. Review steps below with your children. If your older child is taking a lead role, then define that role well for everyone. Keep pictures of the end product available for reference. Younger children can use the picture to design their decorations. A Space force logo to decorate the Rocketship, perhaps, while the older sibling builds the rocket.

Step Two:  The top of the rocket is made with cardboard triangles. Stand your box upright. To cut the triangles for the tip of your rocket, measure along the top edges of your box, where you want the tip to be. If you have a perfectly square box, this should be easy, with a rectangular box it can be tricky. Pick one side of the box to begin with. With the large box described in the Materials section, let us choose the 22-inch side as an example. Cut a triangle with the bottom edge being the number of inches for the side you chose (22 inches). Decide how tall you want the tip to be by using a ruler to measure from the middle of the bottom edge (11 inch) up to how high you want it to be (let’s say 11 inches), then draw the sides of your triangle. If your box is square, just cut out another 2 triangles that match your original.  and you can skip Step Three.  triangles.

Step Three: Here is how to cut the next two triangles if you are working with a rectangular box.  Measure the side of the triangle you just cut out. (In our example the base was 22 inches, the apex of the triangle was at 11 inches, the side was 18 inches). You want the sides of your triangles to be 18 inches and the bottom to be 16 inches to match our example box. Cut out your triangles.

Step Four: Tape your triangles together to make your rocket cone/tip. Set the cone aside. (You may choose to let the younger child start to decorate the rocket cone at this point in your creating process.)

Step Five:  Draw a circle on the side of the box. If you are challenged in drawing a perfect circle, use a large pot lid as a guide. Cut at least two windows, one on each side, to prevent conflict over who gets the window “seat”. U\An adult will now use the box cutter to cut out the round holes for a windows.

Step Six: Using your extra cardboard box, design your rocket wings to the size and shape you want. These not only look great, but also stabilize the rocket when your kids are playing inside. Attach them to the sides of your rocket with the packing tape.

Step Seven: Tape the Rocket Cone to the top with packing tape.

Step Seven: Let the youngest child decorate the Rocketship. Look around the house for a footstool or small chair for the pilot. If your ship is large enough, put two seats in for a navigator, too.

Step Eight: Blast Off, but not before you thank your older child and admire their handiwork.

A Boxcar

cardboard boxcar.jpg


Target Skills: Vocabulary: parts of a Car (steering wheel, seats, doors, seatbelt, windshield, odometer, gas gauge, brakes, tires, side mirrors, turn signals) craft materials (tape, glue, scissors, paints, crayons, paper, etc.), concepts (driver, passenger, safety, speed, roadway, driveway, start, stop, “Chinese” fire drill ), Following Directions, Creating a Plan, Math and Measuring, Cooperation, Task Completion.

Materials: Large cardboard box Packing tape or duct tape, Scissors, Box cutter, Tape measure, Paper Plates, Large Red Plastic Cups, Permanent markers. {I would also look around your home for fabric, pillows, small child-sized chair or bench, poster paints, stickers, glitter, glue…anything that your family can use to customize and decorate your car.)

Note: As you can see from the materials list, this is a project that may require adult supervision in the use of cutting tools. There are, however, many steps in the creation of your boxcar that are appropriate for children aged 3 and up. When you make your creation plan, discuss who will be doing which steps, together or independently.

Object of the Activity: To create a unique boxcar that will provide playful pleasure and encourage interest in travel, mechanical objects and independence.

This project comes from Parenting.com (https://www.parenting.com/activities/arts-crafts/how-make-box-car/). I find so many terrific ideas on this site. I liked this one because, well, all kids love cars. It is a great project for an older child to create for a younger sibling as a surprise but can easily include the younger sibling in the creation and design. All up to you. There are step by step drawings on the site. I have included their picture of the finished project.

Step One: Gather your materials. Review steps below with your children. If your older child is taking a lead role, then define that role well for everyone. Keep pictures of the end product available for reference. Younger children can use the picture to design their decorations.

Seal your large box completely with packing tape, on all sides. Set it on the floor with a long side down, to form the body of your car.

Step Two: This step requires an adult to use a box cutter. Measure approximately two thirds of the top of the box. Draw a line at this point. Starting at the line, cut along the outer edges of the top, opening the top of the car, but leaving it attached to the car’s “hood. Then draw semi-circular “doors” on the sides and cut the openings. Make them large enough for a child to easily get in and out of the car.

Step Three:  This step requires an adult to use a box cutter to cut out a windshield. Fold the top of the box up, perpendicular to the car body. Measure how tall you want the windshield to stand up, cut across the top at that point, leaving the folded edge connected to the car body. Now cut an opening for the windshield, leaving a sturdy edge around the “window”. I recommend about 2 inches around to be able to stand up to children playing. Use tape to fix the windshield upright.

Step Four:  Use glue to attach the paper-plate wheels and steering wheel in place.

Step Five:  Use glue to attach the large red plastic-cup to the front of the car as lights.

Step Six:  This is when everyone can get creative! Use crayons, finger paints, markers, stickers, anything you want to create a custom paint job. Terrific time for the youngest children to get in on the fun.

Step Seven: Use your found objects to create seats and other goodies to furnish your car.

Happy trails!

A Playhouse/ Clubhouse

Target Skills: Vocabulary: parts of a house (ceiling, walls, floor, window, door, corner), size (large, medium, small), math (inches, fractions, top, bottom, numbers, shapes), craft materials (tape, glue, scissors, etc.), concepts (sticky, safety, share, play). Following Directions, Creating a Plan, Cooperation, Task Completion.

Materials: Two Large Cardboard boxes. (If you have more than one child using the playhouse/clubhouse, get four large boxes, to join two houses together.), box cutter, packing tape or duct tape, look around your home for fabric, pillows, small child-sized chair or bench, poster paints, stickers, glitter, glue…anything that your family can use to customize and decorate your house.

Object of the Activity: To create a unique Playhouse/Clubhouse that will provide a place to play together, read, cuddle with a favorite book or pet. Older kids like them two,

Sheknows.com

Sheknows.com

I found the directions for this terrific Playhouse/Clubhouse on Sheknows.com (https://www.sheknows.com/parenting/articles/967135/diy-collapsible-cardboard-playhouse/) . What is neat is that this Playhouse/Clubhouse is collapsible, so it easily stores away when not in use. Cool, huh? Since they are easy to store, everyone can have their own private Clubhouse. There are many pictures of the process on the site. I have included one of the finished product.

Step One: Gather your materials. Review steps below with your children. If your older child is taking a lead role, then define that role well for everyone. Keep pictures of the end product available for reference. Younger children can use the picture to design their decorations.

Start with a large, empty cardboard box. Turn box on side so the opening is perpendicular to the floor. Tall side upright.

Step Two: This step requires an adult to use a boxcutter to cut off the top entirely. Save the piece to use later to form half of the roof.

Step Three: Use tape, perhaps a colorful duct tape, to tape the flaps together at the sides and add some extra support to the bottom flaps and the floor of the house.

Step Four: Retrieve the piece you saved for the roof of the cardboard playhouse. Measure and cut off 1/4 or so to create the steepness of the roof. You can make a steeper roof if you cut more off. Use the second cardboard box, and cut out another roof piece that is the same as the first. Tape the two pieces you just cut together to form the steeple of the roof.

Step Five: Tape the roof and the cardboard playhouse together at the sides of the top.

Step Six: To make it collapsible place the playhouse facedown. Cut down the exact center of the back and bottom, so the cardboard box will fold down properly. Next, cut along the fold where the back and bottom meet.

folded clubhouse.jpg

Step Seven: The box will now easily collapse flat. Fold the back and bottom flaps outward. With the cardboard box flat, tape the edges of the cut flaps together. Then, open the playhouse back up and reinforce with tape along the side seams. You should now be able to collapse your playhouse for storage.

Step Eight: Time to furnish and decorate your playhouse/clubhouse. If you create a house for each child, this is a terrific time for their creative juices to flow. Cozy blankets, pillows, child-sized chairs, a bed tray as a surface to work on, a small book shelf,  posters on the walls! Make it their own, inside and out.

I hope you and your children enjoy creating and playing together. Share pictures of your creations to inspire others.

Change the Conversation to Change Behavior

Someone recently asked me ” What are parents worried about?” My short and, probably too flippant, answer was “Everything”. Parents of young children have always sought advice. Just Google How to handle a picky eater, How to potty train a toddler, or How to deal with sibling rivalry, and you will find just a sample of what keeps parents up at night. Every day I check in on parenting groups across social media platforms to see if there is an overarching concern. Lately I have seen an uptick in cries for help with behavior management from both parents and educators. They describe troubling tantrum behaviors, aggression towards others, growing concern for their child’s expressions of feeling helpless and hopeless, and alarm at their own emotional reactions to these behaviors. I bring some personal and professional experience to this problem. Just reading these posts brings back some hurtful memories. But I also found a way through to the other side that I hope will offer real solutions for families…And, since this is the Gabbing Blog, it is designed to be positive and fun for all concerned.

I’ll start with the end of my story, because we all love a happy ending. My now socially and professionally phenomenally successful adult daughter has given me her permission to share some of her early school experiences. Always verbally precocious and highly energetic, our family all thought that school would be a breeze. It was not. Almost from the start we had reports from her teachers that she talked too much, would not sit still, and had difficulty following classroom routines, although she excelled academically. It hit a crisis point at the start of second grade when she had the misfortune of being assigned to a particularly ridgid teacher who took the stand that she would punish these behaviors into extinction. The result was a child who had melt downs at school, cried at home, and was bullied by the other children. I awoke at night to the sound of her grinding her teeth in her sleep. My husband and I began to doubt our parenting skills, even though our older child was doing well. Keep in mind that I was already an experienced professional, educated in child development and therapeutic intervention. I could only imagine how someone without these resources would feel trying to help their child. After several weeks of crying myself to sleep and some strong prayers I got to work, starting with research. That is when I came across the book that changed our lives in so many ways. Driven to Distraction by Edward Hallowell and John Ratey, originally published in 1992, is still in print and widely available. Although Hallowell and Ratey address Attention Deficit/Hyper-Activity Disorder in their books, the behavior management techniques they describe do not require a diagnosis or medication to be effective. My daughter and I had faster than expected, positive results that continue to benefit our relationship into her adulthood. She describes me as her best friend. Now, that’s music to a mother’s ears!

How to Change the Conversation

crying time out.jpg

Let’s start with the one of the most frequent concerns that appear in the parenting posts. Parents, particularly mothers – but not always- feel as though they are always punishing their child’s behaviors. Time outs just seem to escalate tantrums and aggression and don’t reach the desired goal of peaceful compliance. Parents report feeling out of control and frequently yelling at their child. Everyone is miserable. One of the methods recommended by Hallowell and Ratey is to begin by changing the focus your efforts to concentrate on the positive things the child already does rather than fon the things you want to change. Here is how I did it all those years ago.

In true Gift of Gab style, we will start with the skills that we are targeting. There are parent skills as well as the child skills because communication is a two-way street.

Targeted Skills: Positive language (good job, thank you, I knew you could do it, You can do hard things.), Identifying accomplishments (self help skills, academic tasks, helpfulness at home, polite language) Categorization, Values, Recognition, Rewards and Consequences (not punishments).

Materials: Paper, pencils, markers or crayons, currency (play money, poker chips, or sticker charts)

Object of the Activity: To improve family relationships and establish positive behaviors at home and at school, parent and child will work together to create a positive and meaningful reward system to recognize those positive things the child already consistently does, and  work together to add positive behavioral skills to this list of accomplishments.

Step One:  A Heart to Heart Talk Choose a moment when you are both relaxed and not in a highly emotional state. This is important. Your goal here is to set a tone of recognition of your child’s feelings, and to offer your support. You want to explain how you want to change things to make it better for everybody. Here is a script to start with. Feel free to use your own style, but do not change the meaning.

“You know, we have both been unhappy lately. I feel like I have been yelling at you too much. I’m sorry. I want you to know that I have been thinking about what a good kid you really are. You do so many things all the time that are just terrific, and I think we have been too focused on other things. I want to change that. I have some ideas about how it could be fun, too, and I want your ideas. What do you think? Want to hear my ideas?”

Of course, you know your child best. Speak from the heart about how you want to be a part of the solution and not part of the problem. As the adult. You are the most powerful person in this relationship. Your child needs help to get over this hurdle. You will most likely be met with tears, a need for a hug and enough agreement to move on to Step Two

Step Two: Explain your plan. Explain that you want to start a regular reward system for the things he already does everyday that are good and should be recognized. To do this you are going to make a list of all the good things you both can think of that he does all the time and assign each a point value. He will earn points every day for doing what he already does, so he is guaranteed to have points at the end of the week. These points can be “spent” for “rewards” on a weekly monthly or any longer time period of your choice. For example, when we started our plan my daughter got points for getting out of bed without a fuss (5 points), getting dressed without help (5 points), brushing her teeth without being reminded (10 points) and being ready to leave for school on time (15 points). She already did all these things but leaving the house on time was especially helpful to me as I needed to get to work, so it was worth more points. At the end of the week she could spend her points on a trip to the library (10 points), an ice cream treat (15 points) or a visit to Grandma and Gramps for lunch (20 points). She could also choose to bank her points for a movie (50 points) or save up for a trip to Disneyland (10,000 points) over spring break. (The Disneyland reward is an indication of how desperate my husband and I were to make a positive change for our family.)

Step Three:  Create A List of What is Already Accomplished You will guide the conversation. To keep it small and simple go through the activities he does well every day with minimal or no oversight from you, no matter how small. Assign each a point value. The more complicated the task or the more helpful it is to you and others; the more points are awarded. Here are some ideas:

Morning: Gets up, straightens up the bed, gets dressed, washes up, brushes teeth, helps siblings get ready, puts breakfast dishes in the sink, leaves for school on time

After school: Brings in his bookbag and stores it neatly, gets a snack for himself and/or others, puts dishes in the sink, shares a cookie or apple, does his homework without fuss, reads quietly, plays a game or watches tv with sibling without fuss

Dinner time: Helps set table, cleans up toys before dinner, eats a new food, helps clean up

Bedtime: Takes a bath or shower, puts on pajamas, brushes teeth, gets into bed without fuss

You get the idea…You are not looking to improve anything. Choose behaviors to reward that are already in place. You will also notice that I did not target at school behaviors. Those will come later.

Step Four: Choose a Set of Rewards and a Method for Tracking Them This is where your child will be the most help. He knows best what is rewarding to him. Big items, like my daughter’s desired trip to Disneyland, require a huge point value as well as a huge investment for you and your family. That is fine, if you can do it, but you both also need some more attainable goals that can be offered for more immediate satisfaction. Think of activities that do not cost a lot of money but are fun to do together like baking cookies, visiting Grandma, reading a book together or an afternoon at the park for a picnic. These rewards should be positive for you both. We found that buying things was less rewarding than experiences.

You can choose to track his points in many ways. We used small, coin-sized poker chips with values of 5, 10, and 25 on them. She had a coin bank she kept them in. At the end of the week she counted them up (great math lesson) and decided if she wanted to spend them on a reward or note them in her “bank book” for the future (Disneyland was waiting). You can use a sticker chart, monopoly money, or pennies. Just be sure you have enough for the week and a way to “bank” them. These points add up quickly.

Step Five: WEEKS ONE AND TWO Start the very next day. Be diligent in recognizing every time he does something on the list with a prompt awarding of points. In our experience, this changed the tone of our conversations right from the start. There were more expressions of “That’s great! 5 Points” and “Wow! You did it again!” and much fewer outbursts of frustration. At then end of week one count the points together and let him choose an immediate reward or to bank his points. After you have done this at the end of week two it is time to expand the program.

Step Six: The Talk at the A The Start of Week Three After counting and spending the points of week two, it is time to expand the focus of your efforts. Congratulate him on doing such a good job with earning and spending his points the past two weeks. Now he has shown that he is grown-up enough to start to expand his skills. What would he like to do better? He gets to add a goal to work on something he thinks is a problem for him. Let’s say it is a big problem for him that he loses his temper when his sister uses one of his toys and then he gets punished for it. You can discuss how he can handle that better in the moment. Perhaps suggest that he comes to you to set a timer to allow his sister to play with the toy for 5 minutes. Then it becomes a new family rule that his sister must return the toy when the timer goes off. If he follows through with the plan, he earns 50 points. If he does not follow through and chooses to fuss, he loses 30 points. This is where the concept of consequences comes in. The reward must be bigger than the consequence to encourage the change. Help him to choose a behavior that is troubling to him, then the benefits of the change will be felt by him.

Step Seven: Every Week for the Next 6 weeks It takes 6 to 12 weeks to establish a new behavior pattern. This method gives you an opportunity for a weekly review followed by a reward. As new positive behaviors are mastered, you can address other concerns. For my daughter, once we established a more positive home environment, we focused on school. We had absolutely no cooperation from her teacher. But by this time my daughter knew that her father and I were in her corner and would work on everything with her. We would not give up on her. We focused on giving her the skills to deal with bullies. Every time she used one of these skills at school, she told me about the experience at home at the end of the day. We did not focus on changing the other kid’s behavior, only her own. It was treated like a science experiment. Did that technique work? No? What technique will you try next? (We had a great counselor who focused on her reactions and gave her several ways to react to bullying. It empowered her.) Every time she used a technique, successful or not, instead of losing her temper she earned 50 points. If she lost her temper and got a bad report, she lost 30 points.

Step Eight: It is OK to Back Track. Do not pile on the behaviors to work on. Two difficult improvement behaviors a week is probably the most to keep track of. If it proves too much, back off to the last successful level.

Seek out help from others. As I mentioned we had a terrific behavioral counselor who taught my daughter coping skills to use when she was being bullied. She learned that she had choices in her reactions to the bad behaviors of other people. While it would have been terrific to have a cooperative classroom teacher, my daughter found support from another teacher on her campus who welcomed her into his classroom before school where she worked on math problems. He liked having a student who just liked to learn, and she had a safe haven. It made a world of difference. She added her own goals every week. Some were solutions to problems, some were just things she wanted to learn, like how to make her bed herself, which helped us around the house, and looking after the dog. It was a long journey, but it paid off big time. She “banked” the 10,000 points needed for her trip to Disneyland in just 3 months. We continued to use the point system until the end of the school year when she informed me that she did not need it anymore. I didn’t either.

cleanpublicdomain.com

cleanpublicdomain.com

Communication is the key. A recognition that when your child is suffering through a bad time, they show it through disruptions in their behavior. The whole family suffers. Take a long, hard look at what is happening, identify the problem and develop a plan to make things better. Look for resources in the Parenting section of bookstores or the local library. You will find Driven to Distraction, among other titles that may be helpful. You may also find The Gift of Gab to be a helpful resource in selecting targeted activities to develop and improve communication with your child.

I hope your family finds this helpful.

Create a Cute, Custom, Crafty Cardboard Christmas: Part 1

The holiday season 2020 is promising to be one for the record books. We all want to keep the jolly in the season for our children. Many families have been rediscovering the pleasures of home cooking, bread baking and crafts like knitting and sewing. If you are reading this, you probably have a young child, or several young children, who are expecting a visit from a man in a designer red suit. Or, maybe you want to keep little hands and minds busy creating gifts for others as part of your holiday traditions. You can start your own family Secret Santa or, as a family, create something really special for a neighbor.

Many parents have noticed that their kids seem to enjoy playing with the large cardboard boxes that household purchases, like refrigerators, come in. Sometimes kids seem to enjoy the gift box more than that toy we spent hours searching for. My theory is that cardboard boxes are empty slates that allow a child’s imagination to run wild. All they need are crayons and an idea. You can enlist this imagination to give your child the gift that can be shared with others. I started with an online search for cardboard box designs and found a dollhouse, a spaceship, a car, and a playhouse that can be brought to a finish as simple or as elaborate your child might wish. I am focusing on two Dollhouse designs for this week’s blog, with The Spaceship, Car and Playhouse reserved for my next post. Just as with real houses, doll houses appeal to boys and girls alike. They can be cozy or fancy. So I am giving you two types of dollhouses to get you started.

As always with Gabbing Blog activities and games, these creations are made from readily available materials and can be enjoyed as your child builds speech and language skills. I hope you will find that these craft ideas can also help you to instill a spirit of generosity towards others in this special season. Oh, I almost forgot. These are fun, too!

Two Dollhouse Designs

Target Skills: Vocabulary: parts of a home(ceiling, walls, floor, window, door, corner, kitchen, bathroom, bedroom, living room, etc.}, size (large, medium, small), math (inches, fractions, top, bottom, numbers, shapes), building parts (wood, plaster, glass, vinyl), craft materials (tape, glue, scissors, etc.), concepts (sticky, safety, home, family). Following Directions, Creating a Plan, Cooperation, Task Completion.

Object of the Activity: To create a unique dollhouse that will provide hours of playtime fun.

Simple Dollhouse https://modpodgerocksblog.com/cardboard-dollhouse

modgeposge house.jpg

This project is from the Modgepodge website. It is suitable for a “beginner” skill level. Younger children can make them for their own pleasure or to give as gifts. You can add levels to the house or create an apartment building by creating additional boxes and stacking them. They used a recycled box for their example, so it is a make it, play with it and toss it kind of project. The materials are simple. You probably already have them in your home.

Materials: Mod Podge Gloss or Matte, Small Cardboard Box (a shoe box is perfect),  Paint, Scrapbook Paper, Magazines, Painters Tape, X-Acto Knife (adults should be in charge of using this piece of equipment), Children’s Scissors, Paint Brushes


Step One: Create Your Dollhouse Shape You can buy boxes for about50 cents each at a store like Target or Walmart, or you can use shoe boxes for this project. If you choose a folding box, cut the end flaps off of with your X-Acto knife for the back wall. Then I cut all four flaps off for the front opening of the dollhouse. With a shoe box you can skip this step.

Step Two: Tape up Box with painter’s tape, it’s flexible and easy to paint over. Young children will have fun with this step. Again, if you use a shoe box you can skip this step,

Step Three:  Paint the Box You can use those sample size paints you get at Lowes or Home Depot for this step. Let the kids pick any color they want. The small sample jars cost about $3.00. You can also use any left-over household paint you might have on hand. Apply a total of three coats, letting each coat dry for 20 minutes. You can also use a blow dryer. It can help prevent warping, and it also prevents impatient little ones.

Step Four: Now the FUN part!! Decorate the Back Wall. If you have craft paper handy, now is a good time to use it, but if you do not- no problem. You can use a piece of left over patterned wrapping paper. Or, if your kiddoes want to get really creative, they can design their own custom wallpaper using markers, crayons or paint and writing paper.  Once you have settled on a design, measure and cut your paper to fit the back wall. Start at the top of the “wall”, adding some Mod Podge and laying the paper on top.  Then work your way down.  Don’t overdo the Mod Podge, just paint on a thin layer.

Step 5: Add Details. A little girl or boy will have a blast going through catalogues, magazines and old picture books picking out furnishings for their house.  Mirrors, pictures, flowers, etc. A fun twist would be to decorate the room for a favorite cartoon or storybook character. What kind of rug would Goofy like? What kind of mirror would Harry Potter choose? Here is where your child can perfect their scissor skills, as you talk together about size, placement and why he selected that particular item. Once the picture is sufficiently clipped out, paint a little Mod Podge on the back and gently placed it on the wall or floor. You can also add a thin coat of Mod Podge on top to seal the picture flat.

Step Six: Furnish the room. You can purchase inexpensive dollhouse furniture from a dollar store, you can create origami furniture together, or you can create furniture from small match boxes. Let your child’s imagination run a bit wild!


Fancy Dollhouse https://www.craftsbycourtney.com/how-to-crafts/cardboard-box-craft-diy-dollhouse/

crafts by courtney.jpg

I found this design on a terrific website. It is only one of the creative designs you will find on Courtney’s webpage. This design is illustrated with photographs for each step, so if you want to build this house, please go to her site for the details. An experienced crafter, she designed her dollhouse with children in mind as the end users. You may find that this project is more suitable as a family activity, or as an endeavor for the more independent older children to create for their younger siblings. I am listing her materials recommendations as per her directions, but of course you can customize them to meet your own design preferences and availability. As you can see from the picture, Courtney’s creation is spectacular.

Materials: 1 16” x 16” x 15” Cardboard Box, 1 Roll of Green Painters Tape, 2 Glue Sticks, Craft glue, Hot Glue & Gun, X­-Acto Knife, Cutting Mat, Yardstick, Standard Size Circle Punch, 4 Push Pins, 2 Small Beads, Black Permanent Marker, 4 Sheets of 12” x 12” Scrapbook Paper w/Various Patterns (2 w/same pattern) for Interior Walls, Can of White Spray Paint, 20 ­ 23 Sheets of 8 1/2” x 11 Cardstock for Siding and Inside Molding (Your Choice of Color), 4 Sheets of 12” x 12” Cardstock for Roof Shingles (Your Choice of Color), 1 Sheet of 12” x 12” Cardstock for Door and Inside Molding (Your Choice of Color), 1 Sheet of 12”x12” Cardstock for Outside Molding, 4 Sheets of 8 1/2”x11” Wood Scrapbook Paper for Flooring, 2 Small Plastic Beads

Step One: Create Your Dollhouse Shape: To create the top of your house, cut off opposing flaps from the top of your box. Next, draw out triangles on the remaining flaps. Then, cut the flaps with an X­-Acto knife. Flip the box over and cut opposing flaps from the bottom of the box and tape them together. This will create the bottom floor. Finally, cut an opening in the back of your dollhouse by cutting (leaving a 1” edge on the left, bottom and right of the box).

Step Two: Paint and add Wallpaper. Paint the interior walls by spraying 3 coats of white spray paint (add more if needed) into the box on the left, back and right. Be sure to spray all the way to the top and the sides. Let each coat dry 10 minutes and let the final coat dry at least an hour before handling. Add interior wallpaper and baseboards. To make your wallpaper, cut 2 sheets of patterned scrapbook paper to 8” x 8”. Then, cut the other 2 sheets to 8” x 12”.

Step Three: Add Windows and Doors First draw out the front door to 3” x 4 1⁄2” and cut the top, left and bottom using an X­-Acto knife. Then the draw and cut out your windows.

Step Four: Flooring.  You can use wood look scrapbook paper or another paper of similar thickness, add by using a little glue to keep in place.

Step Five: Exterior Siding and Window Frames. To create your siding, cut 15 sheets of your cardstock into 1” thick strips. Then glue them around the dollhouse using a glue stick. Start from the bottom and go around the house in a single row. Repeat going up until the dollhouse is covered in cardstock siding.

Step Six: Upper Floors and Wall Partition. First, piece together the 2nd floor and wall partition. Then, hot glue the floor to each floor support. Add a dab of hot glue to the top of the wall partition touching the dollhouse. Next, hot glue the top floor to each of the remaining floor support. Add a dab of hot glue to the top of the wall partition on the other side touching the top floor.

Step Seven: Create and Attach Roof. Cut a scrap piece of cardboard to fit to the part of the dollhouse. Punch out LOTS of circles for the roof shingles. Next, glue them to the top of your roof using craft glue (starting from the bottom left and going right, then repeat going up). Each row is about 16 shingles and there are about 15 rows. Now firmly place you roof on the dollhouse using hot glue to keep it in place.

Step Eight: You are ready to Finish and Furnish!

But wait! There’s More! Come back for the next Gabbibng Blog where you will find more cardboard box creations to make your holiday spirits bright!

A BOOOtiful Halloween!

The season of celebration is upon us. The weather is getting cooler, the pumpkins are appearing in shop windows and ghosts are hiding just around the corner. Halloween is possibly is the most fun holiday for kids. Their imaginations soar as they plan their costumes, design their candy collectors, and gather together to go trick-or-treating. This year we are all looking for ways to join in the fun that will keep our families safe as we enjoy the first of the season’s holidays.

Of course, this being the Gabbing Blog, I have some ideas that may do the trick, as we find language treats to go along with the Halloween candy

jack 1.jpg

Some traditions are forever, even in times of social distance. 

Gather all of the old clothes, shoes, hats, gloves and get those make-up brushes out. Every family member can design their own costume and make-up effects. If your family shares a passion for superheroes, cartoon characters, or monsters go for a family theme costume extravaganza! Take photos for your family album, share to your social media pages, or perhaps to use as New Years Cards in just a few short months.

Create a Haunted House of your own. One family shared that they created a Haunted Staircase in their house, complete with cobwebs, ghosts, scary sound effects and flashing lights that are set to go off whenever anyone climbs the stairs. Spooky!

Work with your neighbors to set up neighborhood trick or treat stations. One family placed a bell at the curbside and set up a clothes line pulley system to send treats in a basket to the ghoulies and goblins that ring their bell.

Of course, this would not be the Gabbing Blog without an activity/game or two:. I have one that is traditional, and one that is brand new, just for you.

Create a Jack-o-Lantern.

Pumpkins are made for carving! Of course, when using sharp knives, be sure to keep them out of the reach of small children. The Kids can help scoop out the pumpkins and choose or create the designs that you will cut out.

Target Skills: Following directions, planning, vocabulary (Pumpkin, Jack-o-Lantern, serrated, seeds, scoop,etc…)

Materials: Pumpkin, serrated knife or pumpkin carving set, large spoons or scoops, magic markers, newspaper or plastic tablecloth, candles, matches. Optional: jack-o-lantern designs printed from internet sources, cookie sheets, colander, oven, spices)

Object of the activity: To create  a Jack-o-Lantern, a holiday light made from a pumpkin or gourd that can be used to decorate a front porch, a windowsill or as a table centerpiece.

Step One: Place your pumpkin on a solid surface you can wash, or spread newspaper to catch any drips. Cut into the pumpkin, creating a circle around the stem at the top of the pumpkin, Remove this part, clean off any seeds or strings, and set aside to use as the lid of your Jack-o-Lantern.

Step Two: Pull out the guts and seeds using your scoop or a large spoon, smooth the inside of your pumpkin removing any strings.

Step Three: This step is optional, but tasty! Make a healthy snack by roasting the pumpkin seeds. Add to the fun by following these directions:

Preheat the oven to 325 F (163 C).

Remove the seeds from the stringy core by soaking everything in water to untangle the seeds. Pick out the seeds from the fibers.

Wash the seeds in a colander, drain well and pat dry with a paper towel. Too much water increases the roasting time and may make the pumpkin seeds soggy.

You can choose to leave the pumpkin seeds unseasoned, or you can add flavorings to the cleaned and dried seeds, be sure to combine well, to make the pumpkins seeds sweet, savory or spicy.

Spread the seeds evenly on a baking tray. Bake for 20-25 minutes. Stir the seeds every 5 minutes so they roast evenly. Remove from the oven and let cool for 15 minutes. Enjoy!

Step Four: Draw or trace your design on the outside of the pumpkin, using black magic markers. These form lines thick enough to be a bit forgiving when you carve curvy lines. Be sure that you leave enough pumpkin in your design to support the final creation. Too many holes in the pumpkin side will collapse your jack-o-lantern,

jack 2.jpg

Step Five: Cut out your design. There are pumpkin carving kits that contain thin serrated-edged tools that you can use to saw the design into your pumpkin. These may be safer for older children to use. If not a serrated-edged knife can be used by the adult “sculptor”.

Step 6: Condition your jack-o'-lantern. Make sure that the interior of the pumpkin is smoothed without any hanging strings. Place it by a window to let it dry.

Step 7: Illuminate your jack-o'-lantern. You can use a regular tea lite candle, with safety in mind you can also use battery operated candles or flashlights.

Haunted House Hunt

PXL_20201025_142817221.jpg

This is a game for 2020! In neighborhoods all over the country folks have taken the time to decorate their houses, apartment windows and storefronts for your holiday enjoyment. Even if door to door trick or treating is not practical for your family you can still enjoy the Halloween experience together. Keep the spirit of the holiday alive for everyone!

Target Skills: Holiday Vocabulary (ghost, spooky, Jack-o-Lantern, pumpkin, monster, fun, trick, treat, ghoul, spider web, skeleton, costume, etc…), Attention to Detail, Following Directions, Concepts: same/different, scary/funny.

Materials: Costumes, make-up, treat bags, reflectors, twinkle lights, flashlights, Adult treat bag  filled with candies, stickers, pennies, or anything your family likes best, camera or phone.

Object of the game: The child will earn treats or points for every Halloween themed decoration they spot on a neighborhood walk-a-bout.

Step One: Create a search-list of Halloween related items you are likely to see in your Halloween neighborhood tour. For younger children you can use pictures from the internet or your own drawings to create picture cards they can use to remember what they are looking for. Punch a hole in the corner of each card and place the cards on a ring-clip for easy access.

Step Two: Get all dressed up in your most creative costumes, adults and children together! This is your night to shine, literally. When going out after dark be sure to add reflectors and twinkle lights to your costumes for visibility. Carry Flashlights. Every child must have a treat bag.

Step Three: The Adult treat bag is filled with family favorite treats before leaving the house.

Step Four: Go Trick or Treating. Whether in Suburban or City Neighborhoods, Shopping on Main Street or Fifth Avenue, there will be a treat on every street. Every time your child spots an item on your search list, he/she gets to reach into the adult’s Treat Bag to get a reward.

Step Five: Be sure to bring your camera or phone to record the holiday displays. When you return home, you can create a memory board to enjoy along with your treats.


PXL_20201028_131609731.jpg

Happy Halloween, Everybody!!

Throw A Little Bit of Magic and Some Fairy Dust Into the Mix

We all need a bit of magic in our lives. Across the world, in towns large and small, kids are returning to school in what will probably feel like very strange and complicated circumstances. For some it will be through remote learning over the internet, for others it will mean entering an in-school environment filled with PPE, barriers, masks, temperature checks and social distancing, for many it will be a cobbled together combination of both. Parents, teachers and speech therapists are wrestling with the task of creating a welcoming environment that will work for kids. Now is the time for some magic!

Let’s identify the challenge before we get into the magic spell. During a recent conversation with a colleague who is returning to an in-school environment, I asked her to describe the safety measures she is incorporating in her “speech room” to keep her students and herself healthy. Here is a partial list:

  • a washable face mask for herself, with plastic see-through insert so her mouth is visible

  • a washable plastic face shield

  • disposable plastic gloves

  • a plexiglass barrier between her and her students, with a goal of obtaining plexiglass barriers to separate students safely from each other

  • individualized plastic tubs for each student to keep therapy materials in

  • washable laminated worksheets and game cards for each student

  • individual markers for each student

  • hand sanitizers, extra facemasks and gloves for students who lose theirs

    • All of the above for 45 students receiving in-person therapy services

Doesn’t sound like too much magical fun so far, does it?

How do you interact from behind barriers? We talked about creating colorful laminated posters to display from the “teacher-side” of the barrier with matching game boards for each child to use on their side. But, game pieces are not exactly easy to keep germ free. The kids could point to their choices, but fingers are touchy (pun intended) in hygiene management. So, a pointer of some kind? A pencil? It would work, but not exactly exciting.

How about making everything a little bit more fun?

Magic Wands for toddlers, from the Waterville Public Library, Waterville ME

Magic Wands for toddlers, from the Waterville Public Library, Waterville ME


MAGIC WANDS

This activity develops language, vocabulary, speech production and social skills as it ultimately results in a unique wand creation by and for each child. Best of all, it is a fun activity to create at home.

Target Skills: Following Directions, Vocabulary of Color, Position, Size, Time Sequence, Object Label and Function, Wh Questions, Planning, Cooperation

Materials: Popsicle Sticks, Wooden sticks gathered from the garden, Wooden Chopsticks from a Chinese/Sushi restaurant, or 1/4 inch Wooden Dowels cut to a length of 9 to 12 inches. Choose the most practical option based on the age and creative abilities of the child; Quick Drying Glue and toothpicks; Gather together anything that can be wrapped around a stick and/or glued in place: colorful ribbons, yarn, string, thin copper wire , small beads, glitter, buttons, plastic gems, colored clay, stickers; Paper and crayons/colored pencils ; Plastic bag or bowl for each child

Object of the Activity: To create a unique, personalized Magic Wand for classroom use in game play and practice.

Step One: In preparation for introducing the activity, gather the materials from objects you have at hand around the house. For inspiration and a bit of a shopping spree you can go to a dollar store. Once you have gathered everything, sort the materials by type, size, color, etc.. to make the selection process run more smoothly. When you are ready to begin the activity, display the materials up on the “teacher side” of the barrier, so that the adult maintains control of the materials. Remember: the activity is designed to allow maximum safety in a classroom setting. In a home setting a barrier is probably not necessary, so you can gather and sort the materials together with your child, then display them on the table.

  • Look for opportunities to use the targeted vocabulary as you go. The gathering and sorting of materials allows for language use in giving and following directions, making requests, and description. Have fun and think magically!

Step Two: With the sorted materials in view, each child creates a “recipe” for the creation of a wand, by creating a drawing of the wand to serve as a map to follow in Step Four. Encourage the them to get creative and problem solve. This is an art project, so the end result doesn’t necessarily need to match the initial plan. Ask some questions to keep the conversation going.

  • What is the Wand’s name?

  • What are the magical properties of the wand?

  • What will the handle be made of? What items will decorate the wand

  • Why did you choose that color/sticker/button for your wand?

Step Three: Once the plan is made, each child is provided with the ingredients for their wand’s magic recipe. which are placed in their own plastic bowl, along with a dollop of glue and a toothpick to place the glue on the stick. Even in a home environment, this plan prevents any tussling over what belongs to whom if you have more than one child participating..

Step Four: Following their own pictured plan, each child creates a personal magic wand. Look for opportunities to use the targeted vocabulary as you assist in the creation of the wand. As said above, encourage problem solving and changes to the “recipe”, if necessary. The wand doesn’t need to match the initial plan. It may even be better!

Step Five: When each is satisfied with their wand, set the wands aside to dry overnight. If this is a classroom environment, the wands should be labeled with each child’s name and placed in the student’s classroom box, bag, tub or cubby to retrieve at the start of their next scheduled class.

Step Six: Optional: take a picture of the child with the wand to be printed and used to decorate their personal materials container where everything is stored for individual use and safety.

If you do this at home you can really go to town and create an entire wizard or fairy outfit for your photography session.

Let this activity get your creative juices simmering. Bring some old fashioned magic into the day.

For more ideas and information about managing distance learning, home-schooling and homework take a look at the Gabbing Blog Back to School or Back to the Kitchen Table dated August 19, 2020.

Message me on FB or email to share your own creative ideas, ask a question or let me know if there is a topic you would like me to cover in a future blog,

Until then, have some fun and play everyday!


Potty Training Playtime Fun!


Judging from the questions posed on the parenting websites I haunt and the discussions I participate in, potty training remains a concern for young parents around the world. When should a child be fully potty trained? What if the child resists using the potty? How do I get this done before my child goes to pre-school?

Let’s get some good advice before we get to the fun.

When to start?

According to the Mayo Clinic many children will show with their behavior that they are ready for potty training sometime between the ages of a year and a half (18 months) to two years. (24 months) Some might not might not be receptive until they're 3 years old (36 months). If you start too early, it might take longer to accomplish your goal. Here are the signs to look for?

  • Can he/she walk to and sit on a toilet?

  • Can he/she pull down his or her pants and pull them up again?

  • Does he/she stay dry for up to two hours?

  • Can he/she understand and follow basic directions?

  • Can he/she tell you when he/she needs to go?

  • Does he/she seem interested in using the toilet or wearing "big-kid" underwear?

If you answered yes to most of these questions, your child might be ready. 

The Basics

  • Equipment: If you have a potty chair available, place it in the bathroom. This is my preferred location. I see this as an opportunity to introduce the concept of privacy. Some authorities recommend that you place it where your child is spending most of his/her time. It is certainly up to you. If you don’t have a potty chair, the regular toilet is fine. There are seat adapters available to make your child more comfortable. In either case, just be sure that your child has a foot stool or another support like a box to elevate his/her feet. This is not only for comfort, kids will wiggle a lot if their feet are left to dangle. This “knees elevated” position is also a recommended to encourage,…ahem…the pee pee/ poopy production you are looking for.

    You may want to bring the potty chair with you when you're away from home with your child whenever possible, like when visiting family or understanding friends.

    Try to keep your child in loose, easy-to-remove clothing.

  • Avoid resistance. You may choose to encourage your child to sit on the potty chair in clothes to start out. You might demonstrate the purpose of the potty or toilet by dumping the contents of a dirty diaper into the bowl. Then, sing a good-bye song or wave bye-bye as your child flushes the contents away. The loud sound of a flushing toilet can be disturbing to little ones.

  • Choose your words wisely. Decide how you are going to describe the potty process, including your child's bodily fluids. Avoid negative words, such as dirty or smelly. Use terms like clean up, feel good, and sweet to talk about the result of using the toilet.

  • Schedule potty breaks. Every two hours , beginning the first thing in the morning ,as well as right after naps, place your child sitting on the potty chair/toilet without a diaper for a few minutes. (My experience is that with boys it is most practical to first master urination sitting down, and then move to standing up after bowel training is complete.) If the effort is successful, celebrate! If not, congratulate the child for a good try, and try again later.

  • Stay with your child to offer comfort and support in a new situation. Read a favorite book together, sing a silly potty song (This is the way we make a pee…sssss), play together with a favorite toy while he or she sits. In the beginning, let your child to get up. If your child just sits there without…production, offer praise for trying. Just say that he or she can try again later.

  • Don’t hesitate. If your child shows those signs all parents look for, squatting, squirming, hiding behind the sofa. he/she might need to use the toilet .Act quickly., but without alarm. Help your child identify the signals from his/her own body. (“Do you need to go potty? Let’s see.”). Stop what you are doing and head to the toilet. Be sure to praise your child for telling you when he or she has to go.

  • Teaching good hygiene. Sorry to be a bit graphic, but for girls this means to spread their legs and wipe carefully from front to back to prevent bringing germs from the rectum to the vagina or bladder. For boys it is proper wiping of the rectum until the toilet tissue is clean. For both genders it means to make sure they wash their hands afterward, palms, back of hand and between fingers, for 20 seconds. A currently popular way to keep time is to sing the Happy Birthday song twice, My kids sang “Bye bye, bye bye little pee” to the tune of Twinkle Twinkle Little Star, making up their own silly words to the song. The sillier the better,

  • Finally, ditch the diapers. After a couple of weeks of successful potty breaks and remaining dry during the day, your child might be ready to move on up to training pants or big boy/big girl underwear. Celebrate the transition. Let your child choose underpants or pull-ups from a wide variety of available designs based on super heroes, sports, colors , cartoon characters or anything else that strikes their fancy. You might even decide to get plain old white and have some fun coloring your own designs together with fabric paints.

  • If your child resists using the potty chair or toilet or isn't getting the hang of it within a few weeks, take a break. Chances are he or she isn't ready yet. Pushing your child when he or she isn't ready can lead to a frustrating power struggle. Monitor the ready signs (above) and try again in a few weeks.

    Let your child return to diapers if he or she is unable to remain dry, but don’t make a big deal out of it. Shame is not a teaching tool. Consider using a sticker or star chart for positive reinforcement.

Elmo potty chair screenshot.jpg


Now for the fun part.

These games and others can be found on parenting.firstcry.com/, but I found these same games described on various other sites and parenting blogs. A good idea is a good idea., so keep an open mind and use what works for your family.

Magic Potty

I must admit, this is my all time favorite. This game is a terrific opportunity to teach color words and concepts like color blending, mixing and change. Just be sure to have a toilet cleaner handy to prevent stains to the porcelain.

Add a bit of blue food coloring to the water in your potty, Use a magic word like Abracadabra and watch for the surprise when the water turns green after some yellow pee is added to it. You can go all out and decorate the bathroom with a color wheel to predict what the result will be with red food coloring, or yellow.

Ready…Aim…Pee!

This is one of the best potty training games for boys, but girls like it too!. Toss a few Cheerioes into the potty and then have your little one aim for them as they float around. To get more language growth along with the potty training, use a colored cereal like Fruit Loops. Then he/she can aim for the red ones, yellow ones, etc…

If you use a potty, rather than a toilet you can get potty training stickers with images of a butterflies, trains, flowers, and other high interest objects that appear only when wet. Place them in the dry potty bowl so your child can “wet them”. These make for some exciting games that will keep your little one interested in using the potty and grow language at the same time.

Blowing Bubbles

Keep some bubble blowing equipment near the potty. Not only is blowing bubbles good fun while waiting for the process to be completed, it also activates the abdominal muscles that encourage a good result.

The Scent of Potty Time

This is a good way to encourage hand washing after the potty is used. Most kids are fascinated by scented soaps . Maybe a boy wants to smell like his father’s after shave, or a girl wants to smell like her mother’s perfume. Boys or girls miight choose the aroma of their favorite flower. There are also many scented soaps out there that look like or contain toy cars, dinosaurs or other kid friendly fascinations. Let them choose the soap. Then Tell your child that he/she can use the fancy soap to wash their hands after using the toilet correctly. A special soap for a job well done.

Decorate the Potty Chair

Choose stickers that show objects like cars, toys, flowers, animals, or anything that your child is most interested in. Have some fun as you and your child decorate the potty chair with as many stickers as you can fit. (If you are using a regular toilet, you may choose to use removable stickers) It will give your child a sense of pride and excitement every time they see it. He /She will feel more interested and special when he/she needs to go potty.

It will also give you something to talk about together as you wait for the potty process to culminate. Always look for a way to use everyday activities to grow language.

I hope this information and ideas help you and your child achieve an important milestone of early childhood. Please share any ideas or games that worked for your child.

.


Lights! Camera! Action!

A reader messaged me about her frustration with getting her 3 year old son to sit still long enough to read a book to him. He keeps jumping up and running around the room, squirming if she tries to hold him on her lap. She feels a bit rejected and frustrated that she cannot share her favorite storybooks with him. What should she do?

First, I want to speak to attention to task in very young children. Attention in preschoolers doesn’t often take the form of sitting quietly and looking at what we want them to look at. The words ‘sitting still’ and ‘3 years old’ are not often used in the same sentence. If you observe closely you will see that they are paying attention to an activity that gives them immediate satisfaction that rewards them through movement. The challenge here is how to engage all of that energy in sharing the joys of story telling, reading books and sharing time together. Here is an activity that just might work…

Lights! Camera! Action! (The Three Bears)

Target Skills: Attention to Books, Introduction to Literacy through Illustrations, Narrative Story Telling, Vocabulary , Planning

Materials: An illustrated story book. (Books most suitable for 3 to 5 year olds have an picture on every page illustrating a few lines of printed text), A collection of shirts, socks and other clothing from around the house for costume creation, sets and props. (Option: illustrations, popsicle sticks, glue)

Object of the Activity: To maintain active engagement with a storybook.

Step One: Select a storybook appropriate to the child’s age. For this example I selected The Three Bears Little Golden Book. The Little Golden books are designed for children of this age group with large illustrations and limited text. This story emphasizes concepts of family relationships, locations (city vs. country), comparative textures (hard, soft, hot, cold) and comparative size (large, medium, little) that are addressed in pre-school and kindergarten classrooms. This story also has a wonderful amount of repetition which appeals to young listeners with flexible attention spans.

Step Two: Introduce the activity to your child as “putting on a show” for a visiting family member. This could be an upcoming online call or a surprise for a parent when they get home from work. Read the story together. Let him act out the story as you read about who the characters are (Poppa, Momma, Baby Bear, Goldilocks) , where it all happens (forest), and what they are doing .eating porridge, sitting in chairs, sleeping in beds and running away.

Step Four: Ask the child to decide which part he wants to play in your presentation . As an Option: You might decide to create puppets to act out the story. These can be popsicle stick puppets you can put together with some sticks and glue using illustrations you find online or draw yourselves. Tailor this activity to your child’s interests and abilities. Here are some images available from Twinkl.com:

 
three bears screen shot Twink.jpg
 

Step Five: If you choose a live performance, gather together objects from around your house to create your costumes/puppets and “stage set”. 3 sizes (small, medium, large) of bowls, spoons, chairs, beds.. Get Creative, pillows can be used for beds, toys can be used for bowls or spoons, towels can stand in for golden hair, brown knitted caps can become “bear hats“ with the use of a couple of rubber bands to create ears. This is part of the fun! If you choose a puppet show format, create your stage set using found objects.

Step Six: You may choose to read the storybook together again, this time rehearsing your play and acting out the story using the book’s illustrations as a guide.

Step Seven: When your audience is ready present your play. Make a video with your child as the star!

Putting on a play is a time proven way to attract children to the joys of story telling and reading. Bring all of the family members in on the fun, playing parts, designing costumes or constructing puppets. Before long you will find them creating their own stories.

A Create a Game Challenge!

A friend challenged me to adapt a popular game to create an activity that is fun for a child of any age, using materials I can easily make myself or using what I have at hand in my home.. Then she added into to the mix that I must use Zoom, Skype, or another tele-tool to play with my young friend at a distance. I accepted the challenge.

I started with the board game classic “Guess Who” by Hasbro. This game is a great way to build speech and language skills while keeping the fun factor dialed up to 11. The best part is, with a little tweaking of the details you can customize this game for any child’s interests at any age level to keep the conversation going.

My friends at Simon and Schuster have created illustrated playing cards that are downloadable and printable for the 65 games and activities I included in The Gift of Gab. A complete set of cards will soon be available for download here. To get you started playing, I have posted a preview set of cards here. These illustrations are cute and colorful, perfect for capturing the attention of young children. I chose a few of these cards to illustrate how you can adapt The Gift of Gab game #21, “Who or What am I?” , for distance play. In this example I customized game play for a Pre-school / Kindergarten student, ages 4 to 6. This game design allows play with multiple players in several locations using screen share.

Who or What am I?, Distance Version

Target Skills: Asking and Answering Yes/No Questions, Deductive Reasoning, Vocabulary (Occupations)

Materials: Images of people, animals, places or things that have at least two attributes in common with at least one other item in the set; an email or private messaging account; (optional) an envelope.

This game can be played with more than one Player on the “receiving” end of the Zoom/Skype call. The more Players, the greater number of pictures there are to choose from, the more and varied questions that can be asked. (For maximum game play, select at least 5 pictures per the number of Players. ex: 5 players > = 25 pictures. The more pictures you select for play, the more challenging the game.)

I recommend that the number of questions each Player can ask be limited to half the number of pictured possibilities. In the example below, given a field of 6 possibilities, each Player can ask a maximum of 3 questions to determine which picture the Moderator has hidden.

Object of the Game: To identify the picture that has been sent in an email/message or hidden in an envelope by asking a limited number of yes/no questions. The first Player to correctly identify the picture is the winner.

How to Play:

Step One: The Adult Moderator selects the pictures. Use your knowledge of the Players to select the most appropriate images. I selected “picture cards” showing men and women in occupations, a concept addressed in Kindergarten and Pre-school classrooms. The common attributes in these pictures allow the Players to ask yes/no questions targeting one feature at a time in a process of elimination to zero in on the hidden picture. For older or more mature players you can select photographs of famous or historical people, popular culture or sports figures, famous landmarks, book covers, or any theme that will be of interest and spark conversation. Be sure to select images with common features to add challenge to game play.

Here are my selections:

veterinarian F.jpg
veterinarian M.jpg
Teacher F.jpg
Doctor M.jpg
Chef F.jpg
police officer f.jpg

Step Two: Introduce the rules of the game to the Players. In this example the goal is to identify the picture hidden in the email/message or envelope with a limit of 3 yes/no questions per player, one question at a time, when it is his turn. (See The Gift of Gab for game ideas to determine who goes first.)

Step Three: Show all of the pictures to the Player(s). This is the best time to introduce the vocabulary and concepts you want to reinforce with your picture selection. With my example I can talk about occupations, work, man, woman, Doctors, both for people and animals . I can introduce the specific vocabulary for Chef, Police, Officer, Teacher, and Veterinarian. All of this discussion will assure that the each Player has the ability to ask specific questions when it is his turn.

This is also a good time to model a few yes/no questions and answers for the younger Players.

“Is it a man?” (no”) This eliminates the pictures of men.

Is she wearing a hat?” (yes) This eliminates those women without hats

“Does she cook food?” (no) This eliminates the Chef

“Is she a Police Officer?” (yes) This correctly identifies the picture in the envelope

Step Four: Take a screen shot of all of the cards and share it to your screen so that the Player(s) can see all of the possibilities as they ask their questions.

Step Five: Remove all of the pictures from the view of the camera. Select one picture at random from the group and email/private message it to your Player’s to be opened at the end of the game. Confirm that every Player has received the message, but has not opened it. (Or, if email is not available, you can place the image in an envelope.) Now the Players can see only the original group of cards on their screen(s).

Step Six The Moderator begins play by challenge the Player(s) to identify the hidden picture by asking one yes/no questions, starting with Player One.

Step Seven: The first Player to venture a guess about the hidden picture (“Is it the Woman Police Officer?) is allowed by the Moderator to open his email/message to see if he is correct, without showing it to the other Players. If he is not correct he is out of the game, and play moves to the next Player in the cue. If he is correct the Moderator confirms his choice and instructs all Players to open their messages.

The first Player to correctly identify the hidden picture is the winner.

How did I do in meeting my challenge? Did you try it out with your child/group/family? Was it fun? How did you customize the game? Would you accept the challenge to adapt another game? Share your ideas in an email or on Facebook Don’t forget to like my page to get updates!!.

Power Words from Afar

Conversation with kids can become monosyllabic at lightening speed, especially when you are trying to keep the conversation going over the phone, on ZOOM or Face-time. It usually goes something like this:

You: How are you?

Kid: Fine

You:How was school today?

Kid: Okay

You: What are you doing?

Kid: Nothing

You: Let me talk to your mother.

How do you get a conversation going when you are a distant parent, grandparent or adult friend? Make it a game, of course. This Game is called The Word of Power. Here’s how to play:

Target Skills: Vocabulary Development and expansion, Ease in Conversation, Social Interaction

Materials: 3 x 5 index cards or pieces of paper, pencil, or pen, 3 pre-selected Power Words. ( I found terrific vocabulary lists at Flocabulary for grades Kindergarten to 8th grade. ) Whichever words you choose should be real words, but a bit unusual for a child of your young friend’s age.

Object of the game: To use each vocabulary word correctly in a story, one point for each correct use. Set the goal for “winning” to be encouraging for the child. Very young children can win by using each word once for a total of 3 points. For older children you can make it more challenging by making the criteria the first person to get 9 points wins. A bonus point can be given for creativity.

Step One: Write each selected word on one side of a 3 x 5 card or a piece of paper that is large enough to be clearly legible over a computer screen. On the reverse side, write a brief definition of the word and a sample sentence using the word for each of its meanings. A children’s dictionary like Kids.Wordsmith can be helpful. A brief Google search revealed many to choose from.

As an example for Kindergarten aged children (5 and 6 year olds) I chose : Patient, Gust, and Autumn.

Patient: 1. A person who is being cared for by a doctor or nurse (“Dr. Jill took care of her new patient before going home from the hospital” ) OR 2. The ability to wait for something without fussing. (“Even though he was very hungry, Jeff was patient and waited for his dinner quietly”.)

Gust: a quick brief and strong wind. (“The gust of wind blew my hat right off my head!”

Autumn: the season of the year between summer and winter; fall. (“My Mom loves to see the trees change color in Autumn.”).

Step Two: Introduce the game and the rules to the child. Make it fun. This is a challenge to see which of you can use the words successfully and get all the points first for the win!

Step Three: Show the words and definitions that you have clearly written on the prepared cards.

  1. Introduce the word. Ask if he/she knows what the word means. If they do, terrific!

  2. If the word is new to the child, use the sentences you prepared and have a brief discussion.

  3. Encourage the child to use the word in a sentence of his/her own creation.

Step Three: Now the really fun part. Start a story. The Gift of Gab contains several suggestions. You can always go with the tried and true “Once upon a Time”. Choose your starter to set up many opportunities for the targeted words to be used. For this example: “ Once upon a time there was a gnome who was waiting in the forest among the trees when he saw that a storm was coming.”

Step Four: It is the child’s turn to keep the story going using one of the three target words. In this example I have set up many ways he or she can carry the story forward using one of the three words.

Step Five: Once the child has used all three words in the story (remember, your goal is not to win it is to keep the child talking to you and have fun together) the reward for winning can be a high five Gif, a computer kiss, a story book read by Mom or Dad, or it can be as simple as an enthusiastic “Great Job!”.

Let me know how you liked the game in the comments on Facebook or send an email to francine@giftofgab.site.

Keep the Gab Going!

Things are getting a little intense around here! When together time gets to be too much.

I have a good friend, Joanne Muench, an SLP who is one of the most dedicated professionals I have ever worked with. In the early days of the pandemic Joanne, like every other Speech Pathologist I know, had to master distance teaching and teletherapy therapy techniques practically overnight. Joanne quickly set up a Facebook Group AZ Teletherapy Peeps, which has been a terrific forum for therapy ideas, technical assistance, and provide support to everyone who is feeling a bit overwhelmed. It is something Joanne shared on Teletherapy Peeps about emotional health which I would l;like to pass on. to you.

Whether you have selected a distance learning model for the start of the 2020-01 school term, or if you are supervising homework after a long day of work and worry, things can get emotional very quickly. Being teacher, parent and working adult is never easy. Sometimes playing together can become something else entirely. What began as a fun game suddenly takes turn and emotions bubble up. How do we help ourselves and our children get past the emotional hurdles? I am talking about this in the Gabbing Blog after many discussions with the parents and grandparents of young children who are worried about emotion health, social development, and the overall happiness of their families.

emotional cup.jpg

There are no easy answers, to be found here, but this chart does provide some ideas on how to start a discussion about what may be happening when a child’s behavior seems to be a bit “off”. I like it because it identifies some concerning behaviors and then lists loving and concrete ways you can help smooth the bumpy ride. Children can understand the concept of an empty cup. (For very young children you might pull a cup from the kitchen cabinet and demonstrate the concepts of filling and emptying as you talk. } We want to encourage everybody to “Use your words” when emotions flame up . This chart is a reminder to use language to build positive relationships in stressful times. I hope you find this to be “food for thought”.

The Gift of Gab got its first Amazon Review! And here's activity ideas to celebrate...

Wow!!! The Gift of Gab just got its first Amazon Book Review, and it made me feel sooo happy! Thank you to Lawrence for the wonderful comments and description of the book. You made this author cry with joy.

If you have purchased a copy of The Gift of Gab, please write an Amazon review. Let me know what you think

And Now for Some Fun!

Kids , and most of the adults I know, love to design structures using whatever is at hand; from cardboard boxes to sheets and sticks. I included 2 build it yourself activities in The Gift of Gab: Rainy Day Beach Party and Covered Camping. I have been collecting more ideas from all sorts of places. These come to us from the terrific website, Ikeahackers.net where I found an article entitled 6 Creative Ways to Build a Blanket Fort, complete with diagrams.for building a castle, fort, wigwam, cave, house, and camping tent. Best of all, these are Ikea directions, no reading is necessary, so even pre-readers can have some creative adventures, right in your own living room. Even if you don’t have an Ikea sofa or Ikea furnishings, there are some terrific ideas to be found. Here are two of them.( I must admit, I like the Wigwam the best, but the castle looks like a lot of fun.)

Here are couple of ideas on how to get maximum language development as you build together.

  1. Choose a favorite book set in a castle, Construct your “stage set”, throw together some home-designed costumes and then cuddle up to share a good story. You could also stage your own play and invite Grandparents over to enjoy your theatrics.

  2. Make a wigwam reading nook in the corner of the living room. This can be a semi-permanent structure that is your child’s special space, perfect for alone time to read listen to music and/or snuggle with a favorite pet. Mom and Dad can enjoy some reading time, too. You could also build a tent for every family member to play a game of musical wigwams,. Hide a book inside each wigwam, then march in a circle around the tents as the music plays. When the music stops go into the tent you are next to and discover the book that was hidden inside. Everybody now has a book to read. Be sure to share what you have read after you emerge from your wigwam.

Just writing this made my head explode with ideas. I think I’ll go build a wigwam. See you next time!

FORTS-1080x1080-eng-04.jpg
castle FORTS-1080x1080-eng-06.jpg


Back to School or Back to the Kitchen Table? Planning for Your Child’s Education in a Time of Pandemic.

Parents are now facing a renewed challenge. American school districts are offering them a choice to return their children to in-person classes or opt to educate them at home through online resources. It is not my purpose to guide you in your decision in this forum. I want to recognize that either choice will present with challenges, risks, and, dare I say, opportunities. Your decision will depend on your community, your child’s needs, your work demands, your assessment of the health risks, and your personal resources. No matter which option you may choose for your child, no matter the age of the child, you may find yourself trying to fill a role for which you feel unprepared. I have been in close contact with colleagues who are working in public school districts at the elementary, Jr. High and High School levels. Although they are better prepared to provide on-line services to their students than they were when the pandemic hit, they are parents, too, and have many of the same anxieties that most parents are dealing with. How do you balance your work life and your home life when they overlap? How do you keep your children engaged and on track with their educational goals? What is your role in this? Are you Parent? Teacher? Nag? All of these? How do you keep your relationship with your child on a positive personal basis and at the same time encourage a life-long love of learning?

First, some ground rules: whether you opt for a distance learning program or an in-person classroom setting, you need to set some boundaries.

If you opt for distance learning, know that we all function better when we have a schedule to follow. There should be clearly set “school hours”. No snacks at hand, no tv in the background, no cell phones. Regular bathroom breaks should be in the schedule, for younger children more frequently than for older children who can wait until after each subject instruction. Bathroom breaks should last no more than 10 minutes. Too much time makes it more difficult to return to the work at hand. A lunch break, perhaps when the family can share the meal together, or shared online with a friend or two on zoom. Try to mimic the regular school schedule as much as possible. (Your child’s teacher may be able to help you with that). If you opt to return your child to in-person classes, you will still face the challenge of homework completion. I suggest an hour of decompression time after returning home followed by a set time for homework. All to be accomplished before dinner.

In either case you will need to provide a “study corner”. If you are fortunate enough to have a space you can dedicate to this purpose in your home, terrific. If your family already uses every square inch of your living space, don’t despair. Your “study corner” can take the form of a corner of the kitchen table, with materials stowed in a handy box so that “school” can be set up and organized for easy access and put away after schoolwork is done. (Here is an idea I found on Pinterest that uses an IKEA cart).

The important tools are good light, comfortable seating that gives your child a firm foot resting place and prevents slouching over a video screen,. and a dedicated work surface. The internet is bursting with videos and photographs that will give you creative ideas on how to set up the best environment for your family’s needs. If you treat the activity of learning with respect, your child will, too.

But…What about Games??

In my next Blog I will talk about using games and activities that parents can use to support their child’s academic goals without making everything feel like drudgery.

Is It Too Early for Silver Linings? Perhaps Not...

I have been searching the inter-webs for content and ideas for parents confined at home with small, school-aged children. It occurred to me that you Millennial and Generation X parents are probably much better than I am at finding things on the internet. Many content providers have stepped up to the plate to offer home schooling lessons, art lessons, crafts and more. I can offer you some ideas on how to adapt these offering to benefit your children based on my experience as a professional and as a parent. I will make that my mission in future blog posts.

This post is a bit different. I admit that lately I have been finding it a challenge to maintain a positive outlook. Like many, I am stuck at home far from family and isolated from friends. Just like everyone else I have been using every means possible to keep in contact with others. But, you can’t escape it. The news reports are depressing. How would I handle it if I had young children at home? Well, I think there are some positive things happening in the world. Glimmers of hope if you look for them.

Older kids might find some interest in verified reports that a COVID 19 vaccine has just entered into Phase One testing. Healthcare workers and researchers have made some breakthroughs in treatments for the most severely affected. Everyone should take notice that pollution levels in manufacturing centers in China and other countries have lifted markedly in the past few weeks. It was reported today that dolphins and swans have returned to the rapidly clearing waters of the Venetian canals. There are many videos of people in Rome and other cities in Italy remaining connected while honoring Social Distancing rules through the creative use of balconies. They sing to each other, meet to share meals, share gossip, and call encouragement to people walking their dogs on the streets (One of the few acceptable reasons to be outside at the moment). There are no lines at grocery stores in Rome because there are limits on how much anyone can buy at one time. No one needs to be nervous about food or toilet paper.

These observations can lead to discussions with your children about how your family can make a positive difference where you live. If you live in a suburban setting, perhaps you can invite your neighbors to share coffee or breakfast together by coming out to their front yards in the morning, just to say hello and maintain connections. If you live in an apartment building, how about a hallway party. where all you need to do is stand in your doorway say hello and share a chat.

I would love to hear your ideas. Are you already doing something like this? How did you go about it? How did it work out?

Museums online? Will My Kids be interested in That?

Many cultural institutions both U.S. and International, have made their collections available online. In this time of Social Distancing and Self Quarantine they want to keep their collections in view. I admit, I am a museum-a-holic. I’m one of those people who has a favorite museum in every city I’ve visited, particularly art museums. The arts are non-verbal communication mediums that hold our history, our culture, our fears and our hopes for everyone to see. These ideas can be translated into words and stories that interest even young children with a little imagination. Here’s how:

Step One: Go to the website of the museum of your choice. Something that will interest your child. Science? Art? History? For me it’s history and art, so I choose the Rijksmuseum in Amsterdam.

Step Two: Select a painting or sculpture from the museum collection. I have selected Rembrandt’s The Night Watch. Don’t look at the museum’s explanation. Examine the image. Use zoom to look at the details.

Step Three: Ask questions about the image. Who are these people? What are they doing? Why are they dressed like that? Is this happening now or long ago? How can you tell? Why is that little girl there with all these men? What time of day is it?

Step Four: Now that you have examined the painting together, make up your own story about the painting. The only rule is that you must include details and characters from the picture in your story.

Step Five: Now read the museum’s description. Is it what you thought? How is it different? Which do you like better, your story or the artists’ story?

There is no right or wrong way to interpret art. The experts disagree all the time. Viewpoints change with each generation. Google Arts & Culture has teamed up with over 2500 museums and galleries including the The National Gallery of Art, Washington D.C.(American Fashion 1740 to 1895), the Pergamon Museum in Berlin (the Ishtar Gate of Babylon, The Pergamon Altar) and the British Museum in London (Egyptian Mummies, the Rosetta Stone). Many offer virtual museum tours, so you can “walk” through the museum together, stopping wherever you find an article of interest.

There is something for everyone. Enjoy!

Help! My Kids are Home, Bored and Driving Me Batty!

The old adage “May you live in interesting times.” seems to have come to pass. These times are interesting, alright. They are also a bit nerve wracking and scary. But if we keep calm and think outside the box a bit, we will make it through with humor and grace. We are very fortunate in that many of us have access to telephones, computers and video communication tools like Face time, SKYPE or Whats App. The Italians have been using their balconies to share songs and have meals together. We can, too, wherever possible. We don’t need to be isolated while practicing social distancing. But after the first few phone calls and Skype lunches are we going to run out of things to say? What about the kids? How do we avoid endless repetitions of Frozen? How do we keep the conversation going without dwelling on the negative?

Games are time honored ways to stay focused and involved. Although, The Gift of Gab does not come out until August 18th, I have quite a few games in my bag of tricks that I was not able to fit into the book. I will share them with everyone here, so stay tuned and get ready to have some fun. I will only share games and activities that use household objects or common toys. You shouldn’t need to buy anything to play. These games focus on language skills that cross generational boundaries. Everyone should find some diversion in person or online. So gather around the table, Whats App with Auntie or Grandpa and start playing..

Something In This Room

This was one of my family’s favorites when I was growing up. We could play it on the road, at home, in a store, anywhere there was stuff around to spell. This game was an after dinner tradition, while we all waited for coffee and dessert.

Target Skills: Spelling, asking and answering binary (yes/no) questions

Materials: A room with household objects and furniture.

Object of the Game: The Players guess which object Player One is thinking of. The first one to guess correctly wins the round.

Step One: All players sit around a table or on the floor in a circle. Player One is the first Player to scan the room for an object, in this example a bongo drum. Once Player One has identified the object in his mind, he looks at the other players and says “Something in this room that starts with B.” .

Step Two: The Players scan the room and start to call out the names of objects, people or things that start with the hint letter. “B”. (Books, Bobby, Brains etc…) No order is necessary. The chaos is part of the fun.

Step Three: The first Player to identify the object wins the round. That Player can choose the next object and play starts again at Step One.

Or, to ensure that everyone gets a turn you can agree before starting play that no matter who “wins” the round, Play then moves clockwise to the next Player in the circle.

If you have younger children in your group, or want to play with others on Skype, here is a variation that may prove more enjoyable.

If you could Read My Mind

Target Skills: Syllables, asking and answering Wh (Who, What, Where, When ) questions that can be answered yes or no, or give a choice between two possibilities.

Materials: A pile of small household objects and toys.

Object of the Game: The Players ask questions to determine which object Player One is thinking of. The first one to guess correctly wins the round.

Step One: Players are instructed to gather small objects to place in the center of the play circle or table. Toys, household objects like sponges, spoons, washcloths etc…anything that can be easily carried and placed in the circle. No fewer than 5 and no more than 20 objects should keep game play interesting. If you are playing with players not in the room, make sure that the pile of objects is on camera the whole time.

Step Two: Player One visually scans the group of objects and identifies one in her mind, in this case a red mitten. She then looks at the players in the circle and says “Ready”

Step Three: Proceeding clockwise around the circle the Players ask one Wh question .

“Is it something to eat with?” ………”No”

“Is it Green?”……… “No”

“Do you wear it?”…..”yes”

“Is it one word or two?……”.two”

Step Three: As questioning continues any Player can call out a guess as to which object Player One is thinking of. If Correct, that player has won the round and now becomes Player One. If incorrect , that Player is now out of the game for that round, and questioning continues.

Step Four: If no Player correctly identifies the object after every Player in the circle has had the opportunity to ask 2 questions , Player One tells the group which object she was thinking of.

Note: There will undoubtedly be some discussion as to why the item was not identified. As the adult it is your job to steer the conversation in a direction where everyone can learn to ask better questions or answer questions more accurately. It a game, not a war.

Step Five: If the object was not identified, play moves clockwise around the circle with Step Two, as Player Two identifies the next object to be guessed.

Try these games and have some fun! I’ll be posting more in the days ahead.

Music and Sports and Art Lessons! Oh My! How to Avoid Over Scheduling Your Child

Dateline 2-27-20

An article came across my desk this morning from the New York Times Parenting Newsletter, entitled The Outrageous Cost of Overscheduling Your Child. The reporter, Dani Blum, reports the monetary cost in New York City of several common activities that parents enroll their children in to enrich their lives. Art, Music, Sports, you name it and there is an organization that is targeting you, and your child, with persuasive messages about how their lessons or activities will be of inestimable value to your child’s future. Don’t get me wrong. I support enriching a child’s life with extra-curricular activities. Someone will be the next Picasso, Swift, Ali or Streep, and it all has to start somewhere. But there are costs, and not all of them are monetary. I will refer you to Ms. Blum’s article (for the details on the type of financial investment you may be considering. As a quick reference, Ms. Blum reports a cost of $738 for 16 beginner swim lessons, including goggles at one New York City Upper East Side location. If you add just one music lesson and instrument ($239.99) and one sport (12 weeks of soccer plus cleats for $450) you have a grand total of $1,447.99. But that’s just the financial cost. How about the unintended personal cost to your child?

Over-scheduled parents can lead to over-scheduled children. Too many commitments can result in too little time to be together as a family. Too little time for your child to complete complicated homework assignments, play with friends or even just to think. The resulting stress can be overwhelming for everyone in the family. So, how do you make choices for your child that will allow the necessary balance between school, organized sport, art lessons, clubs and free time? Start with the fixed time constraints. School is 5 days a week, averaging from 8 am to 3 pm. This means there are 5 weekday afternoons and two days on the weekend available in a child’s schedule. Organized sports, like little league baseball or dance lessons, typically require one weekday afternoon of practice and a Saturday game or practice/performance. A youth club like scouts will take up one weekday evening at a minimum. A musical instrument or art lesson is another minimum one-afternoon commitment, not to mention time for practice. Then you have Sunday or Saturday afternoons, depending on your religious preference. If you have more than one child the time cost is compounded.

Having raised two children to adulthood with no internet to consult I learned from experience, meaning I made the mistakes, so you don’t have to. I now pass my hard-learned wisdom on to you. Your children will want to do everything they hear that their friends are doing. Here is when you help them make choices by using my not-so-secret formula to keep scheduled activities in a beneficial balance. My formula for avoiding over scheduling is as follows: A maximum of School + One Organized Sport/Dance Club +One Youth Club + One Musical Instrument/Art Class per week. You and your child accept a commitment of 3 months. At the end of the 3 months your child can decide to continue, try a different club, sport or art or drop one activity to expand a preferred activity. For instance, at one point my son decided to drop scouting to take more guitar lessons. My daughter dropped piano lessons to take more dance lessons. My formula allows your child an average of two after school afternoons/evenings and one whole day on the weekend free to follow his or her own star. At some point your child may decide to scale back to one (or none) club/activity per week to allow for more time for friends or hobbies. This plan is flexible. The main point here is that it is important for your child to have “down-time”. Unstructured time is an opportunity to reflect on what they learned at school, explore their own interests, play or listen to music, draw pictures, read for pleasure, see friends or choose to be alone. The ability to independently use the social and academic skills you seek for them is a gift for life.